Prerequisites
Requirements
- Skyrim Special Edition on Steam.
- A legit Windows 7 / 8 / 8.1 / 10 installation (64bit).
- Editing software such as Notepad++ (freeware).
- An archiving tool like 7zip or WinRAR.
- Latest drivers for your GPU (NVIDIA or AMD).
- A free (or Premium) account on Nexus Mods.
With a Nexus Premium subscription you will be able to complete the guide in significantly less time since you will benefit from the uncapped download speeds. Of course the actual download speeds will depend on your internet connection as well. A one-month subscription costs £2.99, giving you more than enough time to complete the guide.
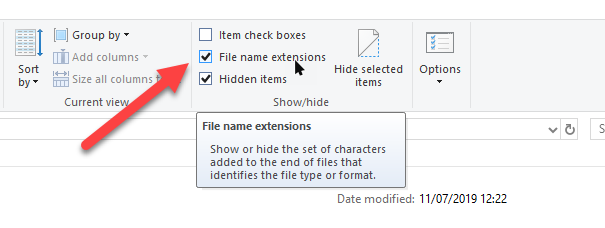
Show File Extensions
By default file extensions (such as EXE, PNG or ESP) are hidden in the Windows Explorer. Since it’s fairly important to be able to see them during the installation of the guide, I recommend double-checking that you have them set to visible.
- Open the Windows Explorer.
- Click the View tab at the top.
- Make sure File name extensions is checked.
Your Modding Folder
In order to keep all files related to modding Skyrim SE in one place, we will create a dedicated directory. It will serve as a hub for all tools, downloaded mod archives, custom files, notes, backups, screenshots and whatever else you can think of.
Throughout the guide I will refer to this folder as Your Modding Folder.
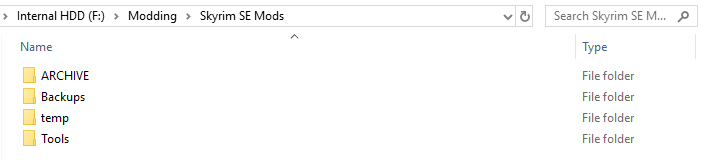
Main Directory
- Create a new folder anywhere on an HDD with at least 200GB of free space. Don’t waste SSD space on this.
- Name it whatever you like, for example Skyrim SE Modding.
- Add several more new folders inside:
- ARCHIVE
- Backups
- temp
- Tools
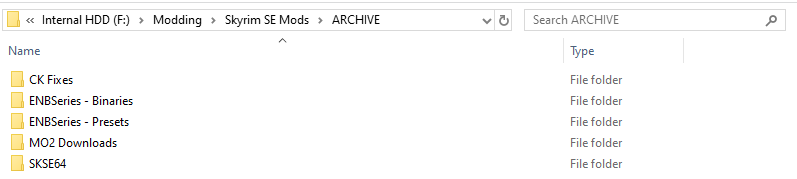
Mod Archive
Proper organisation is key when modding Skyrim. You will come back many times to update or reinstall mods, or selectively extract files without installing the whole package. This is where the previously created ARCHIVE comes into play - it will contain the majority of downloaded mod archives.
- Create several more folders inside the ARCHIVE folder:
- CK Fixes
- ENBSeries - Binaries
- ENBSeries - Presets
- MO2 Downloads
- SKSE64
Monitor Calibration
Assuming you already have your monitor configured with your preferred settings for resolution and refresh rate (in my case that is 60Hz and 1920x1080), you might still want to adjust the brightness and/or gamma either through your graphics card control panel or Windows’ inbuilt calibration tool.
Your monitor should have been running for at least 30 minutes before you adjust it.
- WINDOWS: Control Panel » Colour Management » Advanced » Calibrate display
- NVIDIA: Control Panel » NVIDIA Control Panel » Adjust Desktop Color Settings
- AMD: Unfortunately I do not own an AMD GPU so I cannot give advice here. Use the inbuilt Windows calibration tool.
To help you find the sweet spot for your monitor, check out these resources:
- CLF ENB - monitor calibration help
- Photo Friday Monitor Calibration Tool
- Lagom: LCD monitor test images
Dynamic Range
It is recommended that you ensure your monitor’s Dynamic Range is set to “Full” if it is connected to your PC via DisplayPort or HDMI. Instructions for both NVIDIA and AMD based systems can be found here.
It turns out I actually had my monitor set to “Limited” for many years and grew so used to it that setting the Dynamic Range to “Full” only irritated me. I ended up setting it back to “Limited” with no regrets. Your mileage may vary.
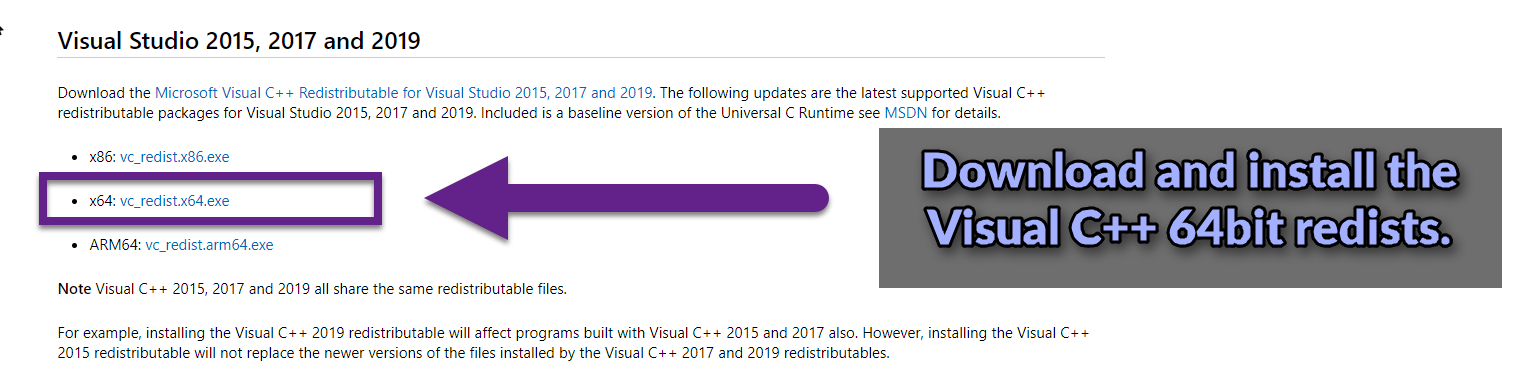
Visual C++ Redist
The Microsoft Visual C++ Redistributable is a basic package required by Mod Organizer 2. You probably already have it installed but it’s best to make sure.
- Open the official Microsoft Visual C++ website.
- Scroll to the Visual Studio 2015, 2017 and 2019 section.
- Download the following file:
vc_redist.x64.exe. - Run the executable, it will guide you through the installation process.