How To Update
Mod Organizer 2
It is possible to update Mod Organizer 2 without affecting your setup if you leave certain files and folders intact. You can do this anytime, and it will not affect your saves, mod list, or even your UI settings.
Remove the old version
- Close Mod Organizer 2 if you have it open in the background.
- Navigate to your existing Mod Organizer 2 installation.
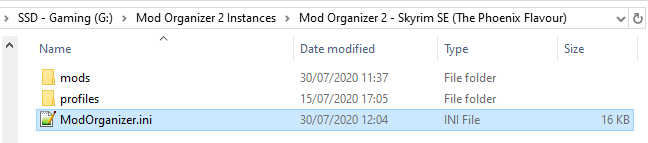
- Delete all files and folders except for the following (see picture below):
mods\profiles\ModOrganizer.ini
Install the new version
- Download the Archive version of the Mod Organizer 2 update.
- Open the archive and move all files into your existing directory with the left-over files.
- Open Mod Organizer 2 as usual and you will see that your setup is fully intact.
- Follow the instructions on the Mod Organizer 2 page for the setup.
Cathedral Assets Optimizer
In order to update CAO without removing the custom TPF profiles, simply do the following:
- Navigate to
Your Modding Folder\Tools\Cathedral Assets Optimizer. - Delete everything except for the profiles folder.
- Download the new version of Cathedral Assets Optimizer.
- Open the archive and move everything into the CAO folder.
- Merge and overwrite when prompted.
This will leave the TPF profiles intact but overwrite the default profiles in case anything was changed about them.
BethINI
- Navigate to
Your Modding Folder\Tools\BethINIand delete everything inside that folder. - Download the latest version of BethINI from the Nexus.
- Open the archive and extract everything into the now empty BethINI folder.
- Re-generate your INI files (instructions here).
DynDOLOD
There is generally no need to update DynDOLOD and re-generate LOD for every new DynDOLOD update, especially when you’re in the middle of a playthrough. However, if you change something about the landscape (like trees or various objects), you need to re-run DynDOLOD and you should update it first.
The instructions are for both Wabbajack and manual users. They are for updating DynDOLOD in an ongoing playthrough.
Disabling DynDOLOD
Wabbajack user: Do not update to the new version yet. Open MO2 with your existing installation.
- Before you change anything in MO2, open the game and load your save.
- Make sure you’re outside (not in an interior cell) in Tamriel.
- Press ESC and go into the DynDOLOD MCM.
- Under Main » Options, uncheck DynDOLOD is active.
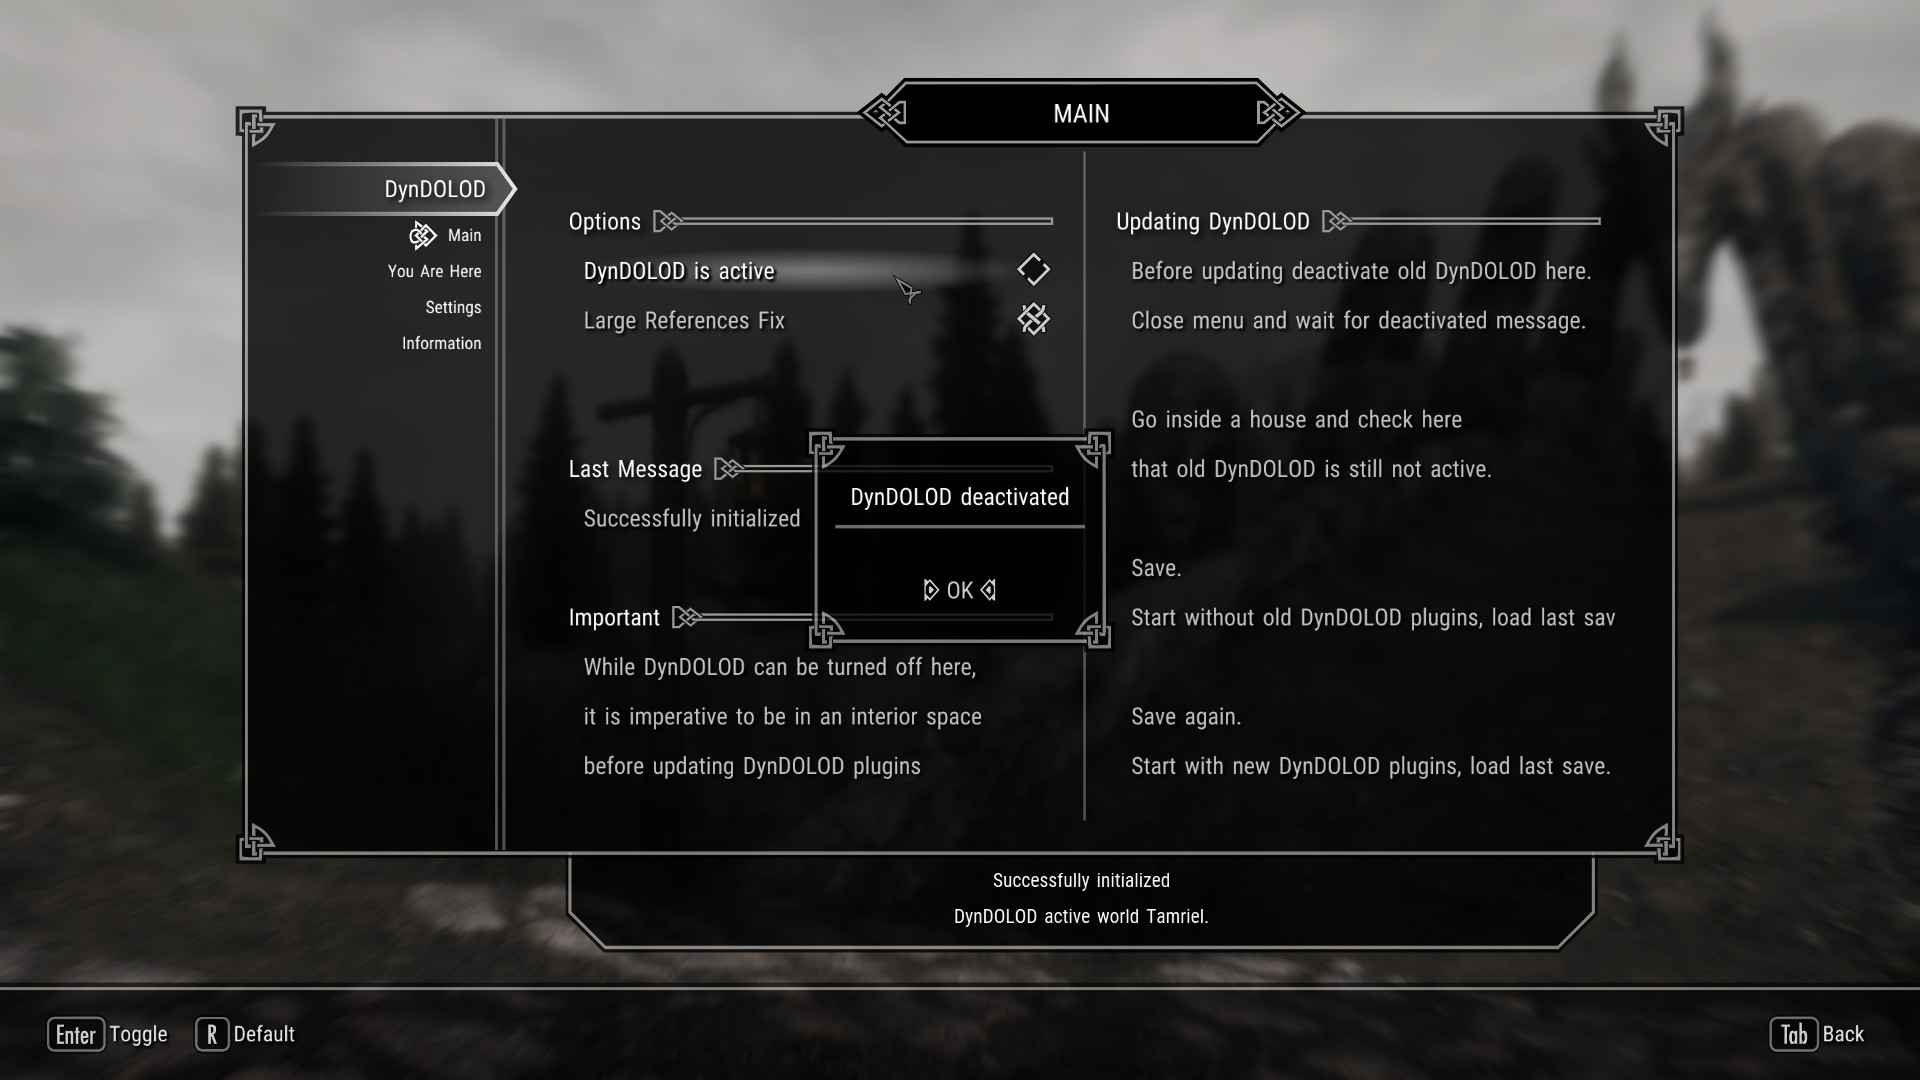
- A message box will pop up, notifying that DynDOLOD was deactivated (see below).
- Click OK, close the MCM, and go into an interior cell (any house or cave will do).
- Save and quit the game.
Resaving without DynDOLOD
- Back in Mod Organizer 2, delete TexGen_Output and DynDOLOD_Output.
- Start the game and hit Continue. Click OK to the warning about missing plugins.
- After the loading screen, stay in the interior cell, save, and quit again.
Updating DynDOLOD
Wabbajack users: At this point you can simply update by running Wabbajack and re-installing TPF over your existing setup. The steps below are for users of the manual guide.
- Download the DynDOLOD Resources SE main file from the DynDOLOD mod page through MO2.
- Re-install it (FOMOD instructions are here) and Replace the existing installation when prompted.
- Navigate to
Your Modding Folder\Tools\DynDOLODand delete everything inside the folder. - Download the DynDOLOD main file from the DynDOLOD mod page manually.
- Open the archive and extract everything into the now empty DynDOLOD folder.
- Go back to the DynDOLOD page in the Finalisation and follow all steps from TexGen Configuration onwards.
- After regenerating TexGen and DynDOLOD, load your save, and continue your playthrough!
Since the folder wasn’t changed, there is no need to update the file paths to the TexGen and DynDOLOD executables in MO2. They are still the same.
Skyrim Script Extender
When SKSE updates, please wait for the guide to update accordingly before installing the new version. For new Skyrim SE versions and matching SKSE updates, many other mods need to be updated as well.
In order to update, you need to replace the DLLs and executable in the root folder as well as the Scripts folder managed with MO2.
- Download the new version of the Skyrim Script Extender.
- Extract
skse64_1_5_x.dll,skse64_loader.exe, andskse64_steam_loader.dllinto your root folder. - Overwrite when prompted.
- If the new version of SKSE is for a new version of Skyrim SE, you will have to delete the previous version’s
skse64_1_5_x.dll. - Navigate to
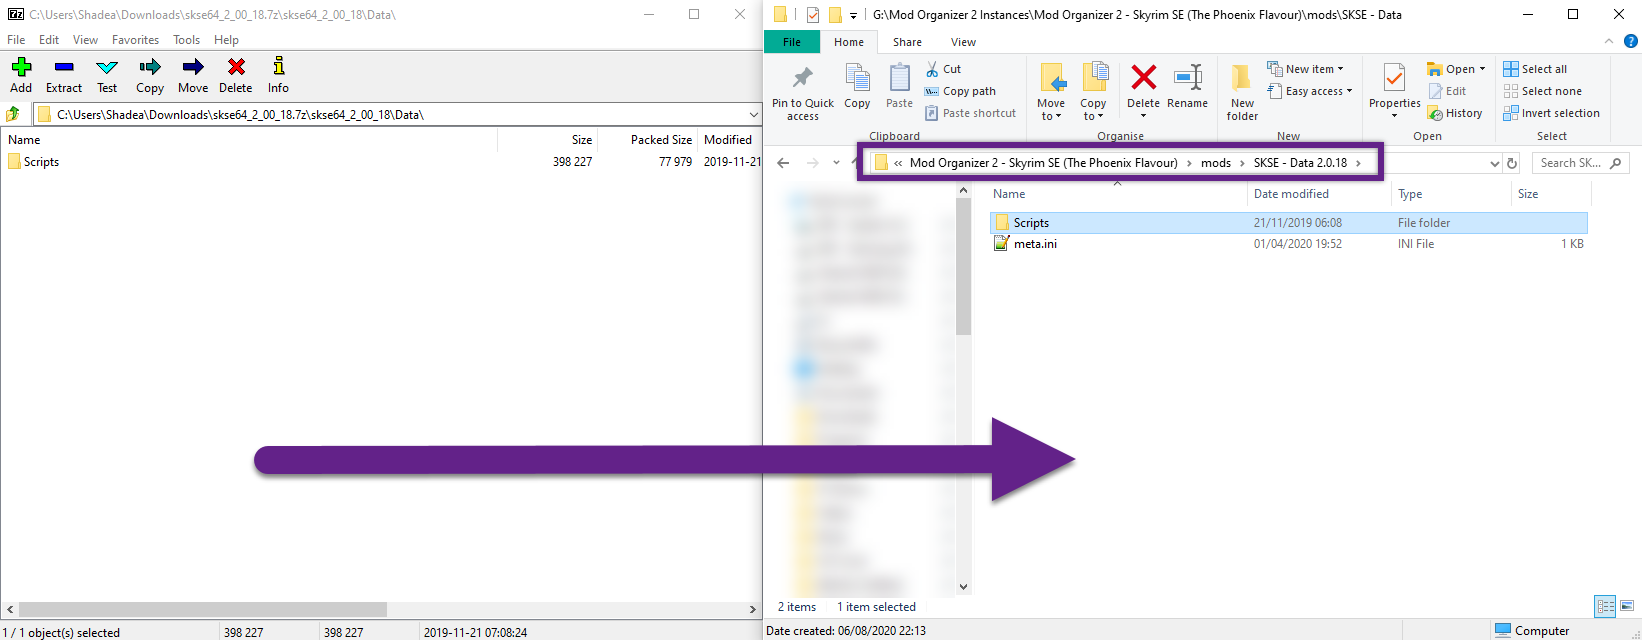
Mod Organizer 2\mods\SKSE - Data 2.0.xand rename the folder for the latest version of SKSE. - Open the folder and delete everything inside.
- Double-click the Data folder inside the SKSE archive and drag the Scripts folder inside into the empty folder.
Adamant - A Perk Overhaul
It is entirely possible to update Adamant in the middle of a playthrough with the help of Ish’s Respec Mod. However, big updates for Adamant often require the guide’s CRP to be updated as well which in turn is often accompanied by a guide update. So while Adamant is basically always safe to update, the CRP is not.
When Adamant as well as the guide and CRP received a save-safe update, you can do the following to update:
- Load your existing save with the old versions of Adamant and the CRP.
- Buy a Draught of Fate Unwound from an Alchemist (Elgrim in Riften is guaranteed to sell some).
- Drinking it will refund all your perks. Wait until you are notified that the process is completed.
- Save and quit the game.
- Update your TPF installation: Adamant, CRP, and anything else that may have changed.
- Load your save and spend your previously refunded perk points.
Creation Kit Fixes
- Download the newest version of the CK64Fixes Release x.x main file.
- Open the archive and extract all files into your root folder.
- Overwrite when prompted.
SSE Engine Fixes
- If (Part 1) was updated, simply click Mod Manager Download and install through MO2 as usual.
- If (Part 2) was updated, click Manual Download.
- Open the archive and extract all files into your root folder.
- Overwrite when prompted.