Installation Guide
Requirements
- Skyrim Special Edition on Steam
- A Nexus Mods Account
- Visual C++ 2019
- .NET Framework 4.8
A Nexus Premium subscription is highly recommended for a significantly faster and easier installation. Without Premium, you will need to manually click “download” for every mod while Premium allows Wabbajack to automatically download everything for you.
Skyrim SE Setup
Update the Game
Slidikins’ Strenuous Skyrim requires the latest version of Skyrim SE.
During installation, your vanilla files will be copied into SSS’ folder and patched if necessary. In order for this to work you will need to have the current Steam installation of the game.
If you are unsure if your Steam installation is up to date, follow these steps:
- Open your Steam Library and navigate to The Elder Scrolls V: Skyrim Special Edition
- Right click and select Properties…
- Under Local Files, select Verify integrity of game files…
- Wait for the process to identify and obtain any files it requires.
- Launch the game. It should prompt you to download updated Creations. Do so.
Set Language to English
SSS requires the English language version of Skyrim SE.
If you are currently playing in a language other than English, please go into the settings for Skyrim SE in your Steam library and revert the language to English. After changing the language, Steam should automatically download the required files (launch the game to force the download if it doesn’t).
After updating the game language, please launch the game once and quit from the main menu.
Wabbajack Installation
Next, you’ll need to install the Wabbajack tool itself:
- Download Wabbajack from the official website.
- Extract to a high level folder (i.e.
C:\Wabbajack\).
Do not install Wabbajack into UAC protected directories. These include
Program FilesandProgram Files x86as well as the Downloads, Desktop, Documents, etc., folders.
Double-click Wabbajack.exe to launch to tool. It will automatically update itself to the latest version.
Choosing the List
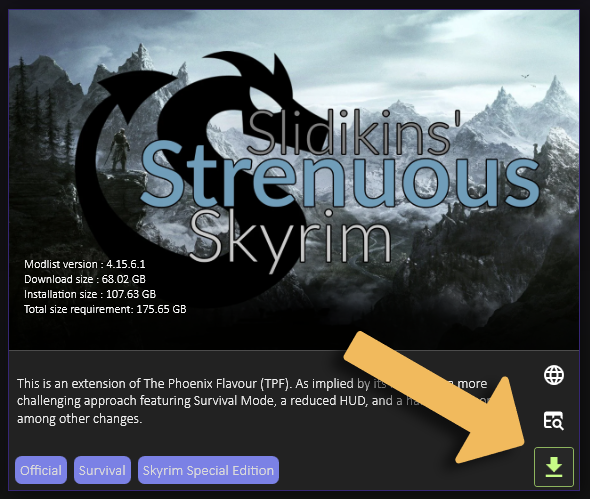
- Click the Browse Modlists button in the Wabbajack tool.
- Find Slidikins’ Strenuous Skyrim in the gallery and click the arrow to download the installation file.
- Once downloaded, the button will change to a sideways arrow. Click it again.

Configuration
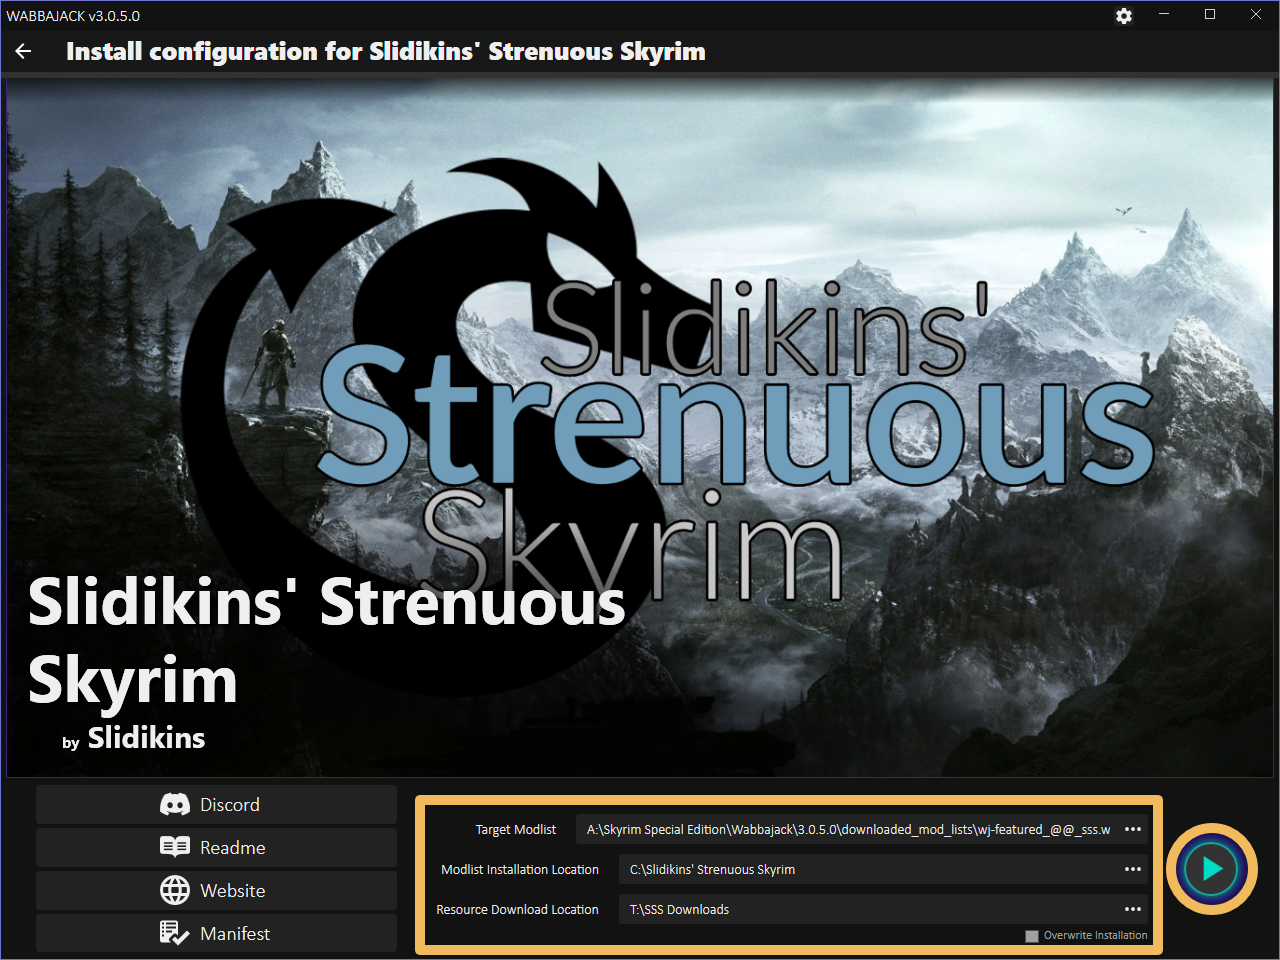
Before you can begin installing the list, you need to define two file paths:
The Installation Location is where Mod Organizer 2 and all of the mods will be installed. Choose a high-level folder such as C:\Slidikins Strenuous Skyrim that is outside UAC protected folders (Program Files, Documents, etc.) that’s on your fastest drive, such as an SSD.
Including the apostrophe in
Slidikins' Strenuous Skyrimcan cause issues on some systems, especially if the default language isn’t English. You may want to omit it when choosing an Installation Location.
The Download Location is where the downloaded mod archives will be stored. By default, they will be placed within your installation folder. I recommend you instead place them elsewhere, such as an HDD with plenty of space. They are not needed for running the game.

Installation Process
Once you have set target folders for the Installation Location and Download Location, the Start button (arrow) to the right of the folder paths will light up. Click it to start installation. If you have Nexus Premium the process will be automatic. It may take several hours depending on the speed of your internet connection. If you do not have Premium, Wabbajack will prompt you with the mod pages where you’ll have to click each download button manually.
You can follow along as Wabbajack installs the list. It will display summaries and links to the mods being installed. Don’t let the log worry you. Unless the installation is aborted completely the warnings are inconsequential.
While Wabbajack runs perfectly fine most of the time, an installation may fail for various reasons. If it does, try restarting Wabbajack first. You will not lose progress as it will pick up where it left off. Should it fail again, please join us on Discord, grab the Slidikins' Strenuous Skyrim role, and post your wabbajack.current.log in the #sss-support channel. You can find all Wabbajack logs in your Wabbajack folder under \Wabbajack\logs\.
Playing the Game
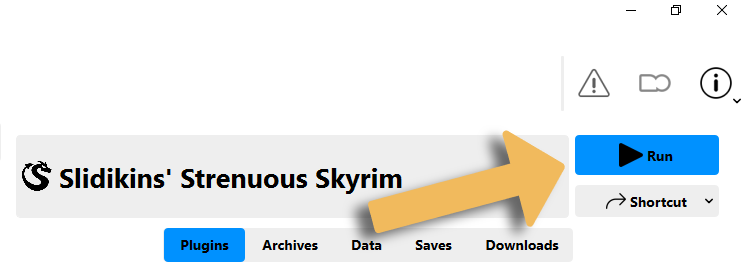
Navigate to your Slidikins’ Strenuous Skyrim folder and launch ModOrganizer.exe within. In the top right drop-down menu, Slidikins’ Strenuous Skyrim (a renamed skse64_loader.exe) should already be selected and you can now launch the game by clicking ► Run.
Slidikins’ Strenuous Skyrim uses the Stock Game Folder system. You don’t have to move anything around as you would in some other lists.

MCM Instructions
There are a large number of Mod Configuration Menus (MCMs) in this list. Thankfully, presets are automatically applied so you don’t need to edit anything manually. These are the recommended settings for enjoying Slidikins’ Strenuous Skyrim; give them a try before changing them around.
Widescreen Support
Basic support for 21:9 and 32:9 resolutions has been added for those with ultrawide monitors. To enable it:
- Go to the (Optional) Widescreen Support section of the modlist in Mod Organizer 2’s left pane and expand it
- Enable the two mods that correspond to your desired aspect ratio
- Go down to the very last separator,
-----, expand it and open Slidikins’ Strenuous Skyrim - Configuration and Runtime Files - Under
INI Files, find SKSE\Plugins\SSEDisplayTweaks_Custom.ini - Edit Line 6 to match your desired resolution (and removed the
;)
As the Configuration and Runtime files may be overwritten by future updates, you may want to place changed files in a separate mod folder, such as
[NoDelete] Custom Configurations, placed at the end.
Performance Profile
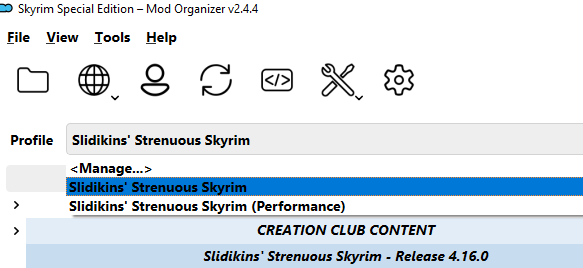
If the list is too demanding out of the box, there is an alternative Performance profile intended for lower-end systems. This profile uses alternatives to the more intensive features (grass, LODs, shaders) to provide similar visuals at a lower cost.
Note that saves are profile-specific. You can switch from the regular to the performance profile mid-playthrough, but you would have to copy over the saves from
\Slidikins' Strenuous Skyrim\profiles\Slidikins' Strenuous Skyrim\saves\to\Slidikins' Strenuous Skyrim\profiles\Slidikins' Strenuous Skyrim (Performance)\saves\manually. Ignore the warnings when resuming your adventure.
See the picture below for how to switch profiles in MO2:

Gameplay Guide
The Gameplay Guide highlights some of the key differences between vanilla Skyrim and SSS. It does not cover every single change made by the hundreds of mods in the list as that would be far too long. Read it if you don’t want to be left out in the cold.