Documentation
Creation Club
SSE Modding Essentials does not require the full AE DLC, but it does include the four free Creations (Fishing, Survival, Rare Curios, Saints & Seducers) because they are required dependencies for the Unofficial Skyrim Special Edition Patch. They are located inside the “Creation Club Content” folder at the top of your mod order.
Creation Organizer
For those who own more Creation and want to use them, I included the wonderful Creation Organizer. In order for Creation Organizer to work, you need to have all creations you own in your default installation folder (that is, Steam\steamapps\common\Skyrim Special Edition\Data). If you just (re)installed the game, you may need to launch it once for your owned Creations to be downloaded.
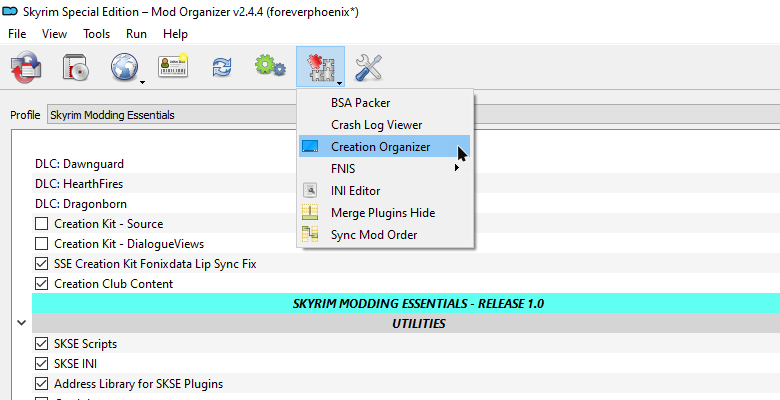
You can “run” Creation Organizer by clicking the option shown below. MO2 will freeze up for a while, just let it do its thing.
By default, the JSON is set up to move all Creations you own into the “Creation Club Content” folder which already contains the four required Creations. If you want each Creation installed to its own folder, go to Modding Essentials\Tools\Creation Organizer\ where you will find alternative JSONs. The second one is the default one from the mod page and the third is intended for Wabbajack lists (adding the [NoDelete] tag to each mod folder).
Pick whichever JSON you like and use it to overwrite the existing one inside Modding Essentials\plugins\creation_organizer\. Then run Creation Organizer again through the MO2 interface. Afterwards, you can delete the “Creation Club Content” folder.
Modding Tools
The following tools are installed and configured for the SME Game Root folder:
- SSEEdit
- DynDOLOD 3 and SSELODGen
- Project New Reign - Nemesis Unlimited Behaviour Engine
- SSE NIF Optimizer
- Bethesda Archive Extractor, recommended to be set as the default app for opening BSAs, very convenient!
- Cathedral Assets Optimizer, including my basic profiles
- NifSkope, both Dev 7 and the elusive Dev 8
- Octagon
- zEdit
- BethINI
- LOOT - Load Order Optimisation Tool
- Wrye Bash
- BodySlide and Outfit Studio
- EasyNPC
Terrain LOD generated with SSELODGen will be placed in Skyrim Modding Essentials\Tools\xLODGen\Output\. Move it from there into the mods folder. It is recommended to change the xLODGen output to a location outside your MO2 folder before generating terrain LOD.
Though BethINI is included, I did not regenerate the INI files. The SME profile in Mod Organizer 2 is using Skyrim’s default INIs with the High preset. Profile-specific INI files are enable.
Make backups of your load order before running Wrye Bash. It may sometimes try to deactivate your plugins and reorder them alphabetically.
I added LOOT because it can be quite useful for curating your own load order and master list, but please do not just click “Sort” and expect your setup to be magically perfected.
For more information for LOD generation, please check Althro’s guide.
MO2 Plugins
- deorder’s plugins
- LostDragonist’s MO2 Plugins
- Crash Log Tools
- NIF Preview
- LOOT Config Loader, see Github for documentation
- Creation Organizer
- Kezyma’s Root Builder
- Kezyma’s Profile Sync
- MO2 Load Order Checker
- LOOT Warning Checker
LOOT Preventifier (from LostDragonist’s MO2 Plugins) was also included, but disabled by default.
Many of these plugins do nothing until they’ve been configured. Check their mod pages for details.
SSEEdit
Generated cache for SSEEdit will be saved to a “cache” folder within the SSEEdit installation directory (\Skyrim Modding Essentials\Tools\SSEEdit\), and plugin backups will be saved to a “backups” folder within the same directory. The prompt which warns about making changes to plugins was disabled with the -IKnowWhatImDoing argument.
The QuickAutoClean exe was also added with the -DontCache argument in case you wish to clean the official master files (without this argument, the cleaning would nuke parts of Apocrypha).
I also installed mator’s xEdit Patching Framework and mator’s Automation Tools for TES5Edit.
ENBSeries
Since many people use ENB presets, I included a set of essentials:
- The latest enbseries binaries with a preconfigured enblocal.ini which you can use with any preset
- Particle Patch for ENB with Fixed Skeever Dinner Meshes and Ghost Pile Seam Fix
- ENB Helper with ENB Helper Plus and ENB Input Disabler
In the enblocal.ini, VSYNC is disabled because SSE Display Tweaks is used for VSYNC instead. The framelimit is turned off. If you want to limit your framerate, it is highly recommended to do so using SSE Display Tweaks. Finally, the hotkeys were adjusted, please check the “Hotkeys” section further down on this page for more information.
If you want to install an ENB, enable the ENBSeries - Binaries and ENBSeries - Settings ‘mods’ in Mod Organizer 2. To add a preset, create a new empty mod with a folder called Root inside - \SME\mods\<Preset Name>\Root\ - and extract the enbseries.ini and enbseries from a downloaded preset to this location.
Thanks to the Root Builder plugin, any files located in
\mods\<mod name>\Root\will be moved to the actual Root folder when an executable is run through MO2 (like when you start the game via SKSE). This allows you to use MO2 to manage root folder files.
Further Notes
Please always be careful when adding mods and familiarise yourself with the existing setup first.
The configuration files for various mods were left untouched except for a few cases which are marked in the MO2 notes. Enable/disable settings based on your setup and preferences.
I included Face Discoloration Fix which fixes mismatched facegen at runtime. However, that doesn’t mean you should no longer worry about facegen because if you let all your facegen conflicts be handled by the plugin there is a performance impact. For the love of Talos, regenerate your facegen! Refer to Althro’s Guide if you are not sure how to do it.
Modder’s Tools
More Informative Console adds debugging functionality to the console. Click on any item, static, or NPC ingame to see their Base/Ref ID and other vital data which is vital for troubleshooting and fixing up your setup.
QUI not only includes Stay At The System Page for Skyrim 1.6, but also adds a menu through which you can access items added by mods, sorted by plugin, all of which is highly customisable. You can open the menu ingame with F8 (the hotkey can be changed in the config file in MO2).
Where In Special Edition Am I adds a convenient method to determine your exact location ingame, at least until you have DynDOLOD set up in which case its MCM has the same feature.
Hotkeys
The hotkeys for some of the mods/tools included in Modding Essentials were slightly tweaked in a way that I feel is more convenient. These tweaks assume that you are otherwise using the default hotkeys for quicksave/quickload (F5 and F9 respectively).
- F7 toggles the ENB FPS counter
- F8 opens the QUI ingame item browser
- F9 is the default quickload
- F10 opens the ENB GUI
- F11 toggles the ENB effect