Installation
Important Notice
This list is currently not available.
Requirements
While Wabbajack takes care of 99% of the work, there are still some steps that need to be completed by the user. The Installation section will take you through the process from start to finish and you are expected to follow it to the letter.
Welcome to Paradise requires:
- A copy of Fallout 4 with all official DLC (Game of the Year Edition) on Steam.
- A Nexus Mods account, preferably with a Premium subscription.
- Around 35.5GB for WTP, 25GB for the downloaded mods, and 34.5GB for the base game.
Grab a glass of Nuka Cola and let’s get started.
Playing on Steam Deck? Follow these instructions instead.
MO2 Prerequisites
Mod Organizer 2 requires the Microsoft Visual C++ Redistributable and .NET Framework 4.8, two basic packages. Chances are you already have them installed, but please grab the two installers linked below and run them. If the packages are already present on your system, the installers should notify you.
- Download and install Visual C++ 2019.
- Download and install .NET Framework 4.8.
If either of them were missing on your system, they will be installed now. Afterwards, you may be required to restart your PC.
Uninstallation
In order to ensure that your Fallout 4 installation is pristine and vanilla, we are going to completely re-install the game. This is especially important if you have modded the game previously as left-over files might interfere with your WTP installation.
If you never modded Fallout 4 and/or never installed other Wabbajack lists, you may skip this step. However, I still recommend that you verify the game files through Steam.
- Uninstall Fallout 4 through Steam
- Navigate to your Steam directory:
C:\Program File x86\Steam\steamapps\common\. - If there is still a Fallout 4 folder, delete it.
When uninstalling a game through Steam, only vanilla files are removed. Mod-added files must be deleted manually.
INI Folder
More Fallout-related files are located inside the so-called INI Folder which needs to be cleaned out as well. It contains your savegames as well as the game’s INI files and, if you modded Fallout 4 before, F4SE plugin logs.
- Navigate to the INI Folder:
C:\Users\{Your User Name}\Documents\My Games\Fallout4. - If you have an ongoing vanilla playthrough, back up the Saves folder.
- Delete everything inside the Fallout4 folder.
Official High Resolution Texture Pack
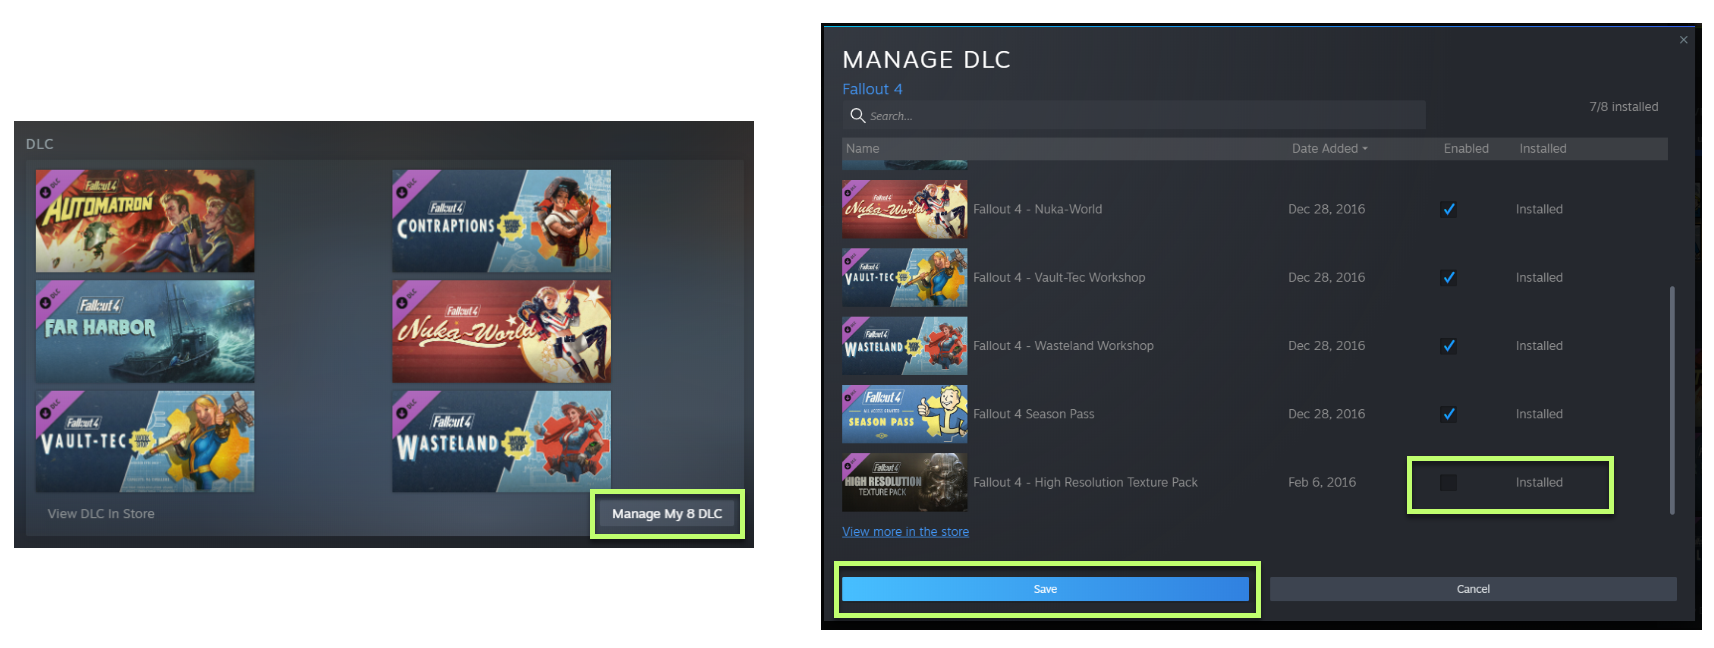
Bethesda published a free 55GB texture pack with upscaled 4K textures that are nowhere near worth the hard drive space, especially not when compared to the higher quality textures from various mods that are featured in WTP.
Disabling the HD Texture Pack is mandatory (you will experience visual glitches if you fail to do so).
- Open Steam and go into your Game Library.
- Go to the Fallout 4 page and click Manage my 8 DLC.
- Uncheck Fallout 4 - High Resolution Texture Pack in the list and click Save.
Reinstallation
The reinstallation also serves the purpose of relocating the game files to a better directory. Using UAC protected folders (such as C:\Program Files\ or C:\Program Files x86\) for the game or any modding tools has a risk of causing issues down the line. It is best to avoid those folders to begin with. Most Wabbajack list authors, myself included, will not provide support for people that disregard this warning and use UAC protected folders anyway.
Note that this does not include the Steam client. Most people will have it installed under C:\Program Files x86\Steam\ which is completely fine.
Additionally, Fallout 4 and Mod Organizer 2 should be installed on the same hard drive. Ideally that hard drive would be an SSD to reduce loading times and eliminate stuttering.
Steam Library
In order to prevent some confusion, I will refer to the Library in Steam as the Game Library. It is the second of four items in the top menu in the Steam client and contains a list of all your games.
A Steam Library on the other hand is a folder on your hard drive into which Steam games are installed. By default, this would be C:\Program Files x86\Steam\steamapps\common\. Since we do not want to have files inside a UAC protected folder like Program Files x86, we should not install Fallout 4 in the default directory. A new Steam Library is required.
Unfortunately Steam allows only one Steam Library per hard drive. You can find a workaround here.
If you already have a separate Steam Library outside the UAC protected folders on the drive you want to install Fallout 4 and Mod Organizer 2 on, skip ahead to the next step.
Otherwise follow the instructions below to create a new Steam Library:
- Open Steam and go into the Settings.
- In the Downloads tab, select Steam Library Folders.
- Click Add Library Folder.
- Point it to a location somewhere outside the UAC protected folders, e.g.
G:\Steam Library\. - Close all windows when you’re done.
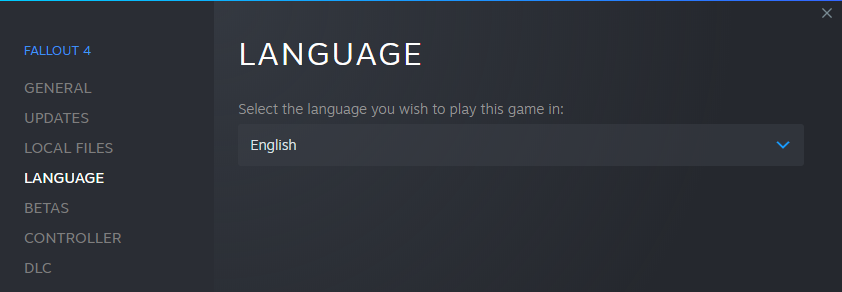
Setting the language to English
Non-English installations of Fallout 4 are not supported.
- Right-click Fallout 4 in your Steam games library.
- Select Properties and switch to the Langauge tab.
- Ensure that the language is set to English.
Reinstalling the game
- Open Steam and go into your Game Library.
- Find Fallout 4 in the list and click Install.
- As location, select a Steam Library in a non-UAC protected folder and click Next.
Wait for Fallout 4 to be downloaded before you proceed.
Regenerating INI Files
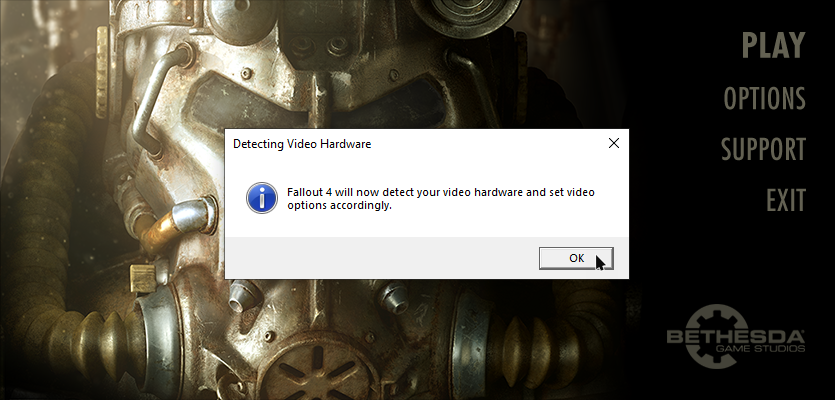
After re-installing the game, it is important to launch it at least once through Steam so that the registry keys are set up. Otherwise, certain modding tools may not recognise the game. Upon launching the game, the default set of INI files will also be regenerated.
- Find Fallout 4 in your Games Library and hit Play.
- You will be prompted with a notification that Fallout 4 is configuring your video options, click OK.
- Click OK again to the next window and hit Exit to close the launcher.
The preset that is selected now will be irrelevant. WTP uses its own set of INI files.
Future Updates
The most important mod for most Bethesda games is the Script Extender, a resource that is in turn required for many key mods. The Fallout 4 Script Extender (F4SE) is version dependent. It requires a specific version of Fallout 4. For instance, F4SE 0.6.23 requires Fallout 4 1.10.163, and will not work with any other version of the game.
Unfortunately any update for the Creation Club requires the game executables to be updated which breaks F4SE every time. When that happens, the Script Extender team usually updates F4SE within a few days. Any F4SE plugins will have to be updated by their respective authors as well which can take several weeks.
In order to prevent Creation Club updates from interrupting your playthrough and breaking your game, we are going to disable automatic updates in Steam. We are also going to backup the current version’s executables so you can restore them at any time.
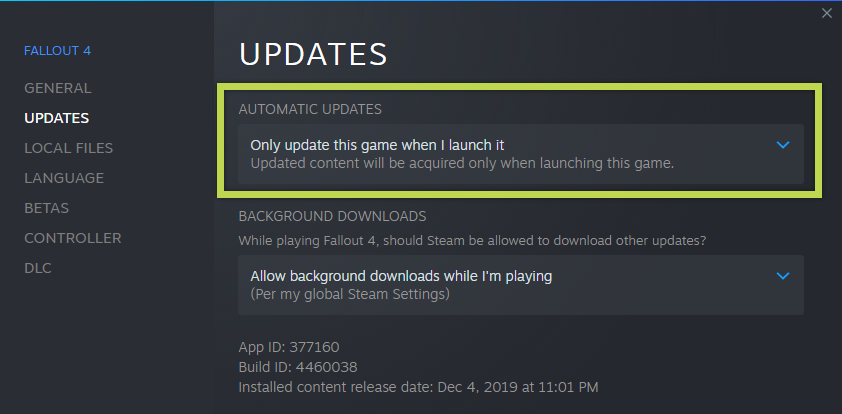
Disable Auto Updates
- Open Steam and find Fallout 4 in your Game Library.
- Right-click it and select Properties
- In the Updates tab, change Automatic updates to Only update this game when I launch it.
- Close the Properties window.
Creation Club Content
If you bought any “creations” from the Creation Club (or grabbed some while they were available for free), they may still be present in your Data folder. The Modular Military Backpack CC si supported in WTP as of version 1.6 but if you want to use it I recommend you install it as a separate mod later on (there are instructions further down on this page).
- Navigate to
\steamapps\common\Fallout4\Data\and cut (CTRL + X) all files starting with cc. - Paste (CTRL + V) all files to a convenient backup location.
Wabbajack Installation
- Download the Wabbajack executable from the official website.
- Move the downloaded file to a convenient location outside any UAC-protected folders.
- Double-click Wabbajack.exe. It will automatically download and install the latest version.
Downloading WTP
- Once Wabbajack is installed and open, click on Browse Modlists.
- Find Welcome to Paradise in the list and click the arrow to download.
- Click the dots next to Installation Location and choose a path.
- Choose an empty high-level folder, e.g.
G:\Welcome to Paradise\.
The Welcome to Paradise installation folder:
- SHOULD be on your SSD or otherwise fastest hard drive.
- CANNOT be inside the Wabbajack installation folder.
- CANNOT be inside the Fallout 4 installation folder.
- CANNOT be inside
C:\Program Files\orC:\Program Files x86\.
Download Location
The MO2 downloads folder within your Welcome to Paradise folder will automatically be chosen as the download location. However, this is mostly a waste of space as the downloaded mod archives are only required for the initial installation and subsequent updates but not for gameplay.
I strongly recommend changing the Download Location to a folder on a hard drive with plenty of free storage.
You can reuse the download folders from different Wabbajack lists for the same game.
WTP Installation
After filling in the installation and download directories, click the Start button on the left. If you have Nexus Premium, you can lean back while Wabbajack downloads the required mod files and installs the setup. Otherwise, you will have to click through the mod pages and download manually (Wabbajack will guide you).
Should anything go wrong during the installation process, please find the Wabbajack.current.log file inside \Wabbajack\<version number>\logs\. Create a new post in the #wtp-support forum on our Discord server and upload the log there.
Once the download and installation process has finished successfully, Wabbajack will inform you about it and you can proceed.
Mod Organizer 2
All mods are installed in Mod Organizer 2 which is required to play the setup. You must always launch F4SE through MO2.
- Navigate to your Welcome to Paradise installation directory.
- Double-click ModOrganizer.exe.
I recommend adding ModOrganizer.exe to your taskbar or creating a shortcut on your Desktop for easy access.
Performance INIs
If you are playing on a lower-end PC and are worried about performance, you can install the performance-optimised set of INI files included with WTP:
- Navigate to
\Welcome to Paradise\mods\WTP INIs - Performance\and copy the Fallout4.ini and Fallout4Prefs.ini inside. - Paste them to
\Welcome to Paradise\profiles\Welcome to Paradise\and overwrite the existing ones.
Repeat the process with the INI files from WTP INIs - Default to revert to the default settings.
Resolution
Unlike the default INIs, Wabbajack will not be able to automatically adjust the resolution in the INI files and you will have to do this manually.
Skip this if you are on an ultrawide monitor (there are instructions further down on this page).
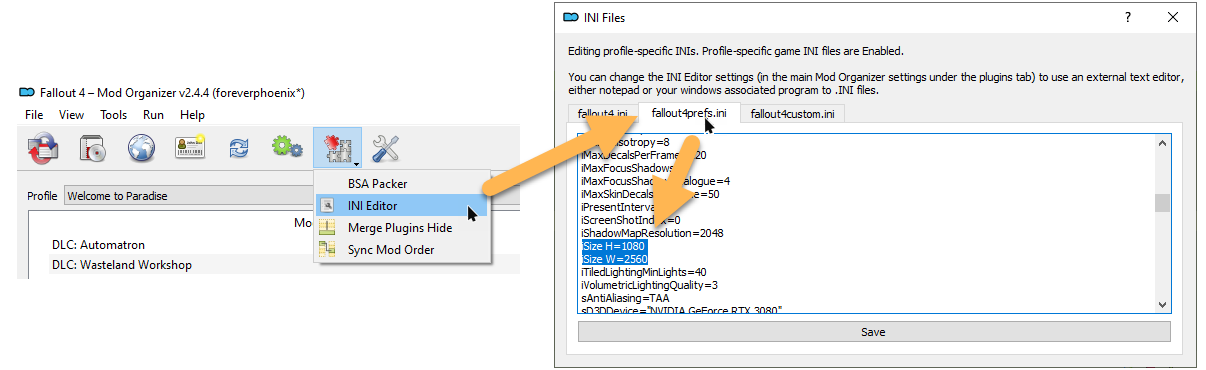
- To change the monitor resolution, open the INI Editor in Mod Organizer 2 (see picture below).
- Go to the Fallout4Prefs.ini tab and scroll to the
[Display]section. - Change the following two lines to match your monitor resolution:
iSize H=
iSize W=
- Click the Save button at the bottom before you close the window.
Controller Fix
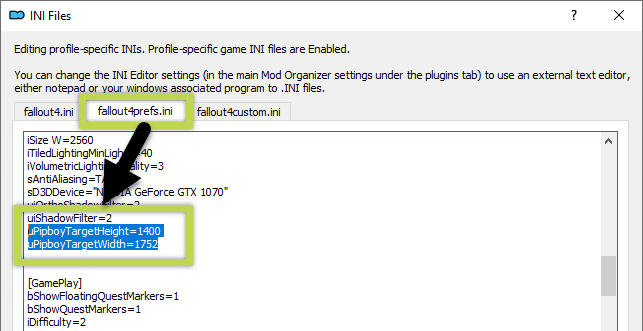
The resolution of the Pip-Boy interface was increased in the fallout4prefs.ini file. Unfortunately this will cause the map cursor to lock in the upper left corner when playing with a controller.
If you play with a controller, follow these instructions to revert the INI tweak:
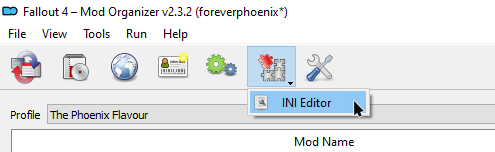
- Click the puzzle icon in MO2 and select INI Editor.
- Switch to the fallout4prefs.ini tab and scroll down to the [Display] section.
- Revert the following lines to the values shown below:
uPipboyTargetHeight=700
uPipboyTargetWidth=876
- Close the window and click Yes to save your changes.
Frame Rate and VSYNC
One of the Creation Engine’s drawbacks is the physics engine which is tied to the frame rate. Simply put, the game breaks if it runs at more than 60FPS. However, there is a mod that allows you to unlock the frame rate by dynamically adjusting havok settings at runtime, aptly called High FPS Physics Fix.
- FPS or frames per second are how the amount of still images shown every second are measured. The higher your FPS, the more fluid the game appears. The amount of frames per second that can be rendered depends on your hardware, primarily your CPU and GPU. In my opinion, a stable 60FPS is perfect for most games, including Fallout 4. Most systems should be able to achieve a consistent 60FPS in WTP.
- VSYNC is a technique that syncs a game’s framerate to your monitor’s refresh rate (hence the name). It prevents screentearing at the cost of latency and is always recommended.
Welcome to Paradise caps the framerate at 60 and forces VSYNC through High FPS Physics Fix.
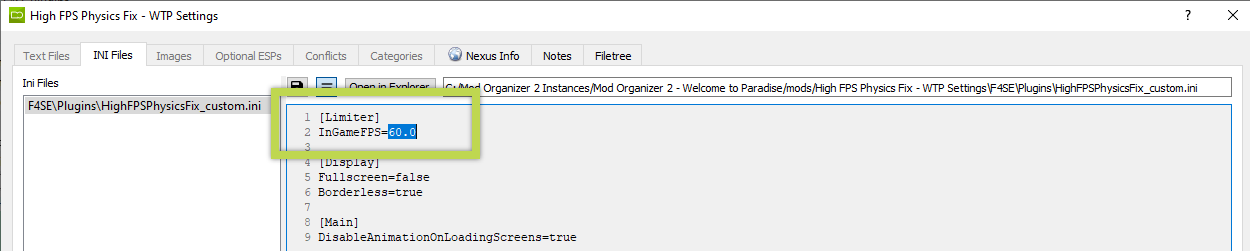
Adjusting the FPS Cap
If you are unhappy with the default cap at 60FPS, you can change it. To do so, follow these instructions:
- In Mod Organizer 2, double-click the ESSENTIALS separator at the top to expand it.
- Doubl-click High FPS Physics Fix - WTP Settings which contains a custom INI for High FPS Physics Fix.
- Switch to the INI Files tab and select the HighFPSPhysicsFix_Custom.ini file.
- In Line 2, change the value for
InGameFPS=to your desired FPS cap. Set to 0.0 to uncap the frame rate. - Press CTRL + S to save and close the window.
Ultrawide Support
Skip this step if you have a 16:9 monitor.
Since release 2.2, WTP officially supports ultrawide monitors with a 21:9 ratio, i.e. resolutions of 2560x1080 or 3440x1440. This requires a few minor changes in Mod Organizer 2 that you should go through before starting your playthrough.
INI Changes
Upon installing WTP, Wabbajack should automatically detect your monitor’s default resolution and configure Fallout4Prefs.ini accordingly. However, if you wish you can check this and make sure the correct resolution is set. To do so, open the INI Editor in MO2, go to the Fallout4Prefs.ini tab and scroll to the [Display] section.
If the resolution is not correct, change it and click the SAVE button at the bottom before closing the window.
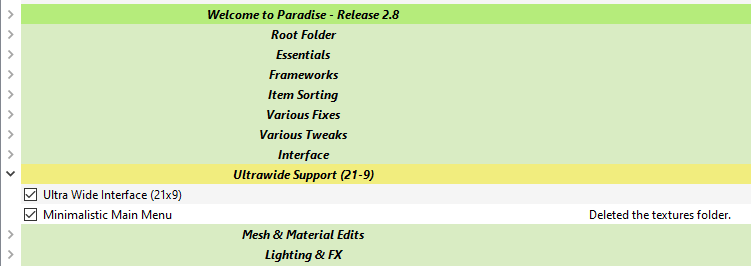
Additional Mods
In Mod Organizer 2, find the Ultrawide Support (21-9) separator in the left pane and double-click to expand it. There are two mods below it. Activate both by checking the boxes. This will add an additional plugin to the load order which you do not need to adjust because it is empty and only exists to load an INI file.
Optional Tweaks
You may have noticed a second highlighted separator in Mod Organizer 2 called Optional Tweaks. This section contains a few minor additions that are disabled by default, but you can enable any of the mods here whenever you like.
- No Smoldering Turrets removes the ugly fire animation from destroyed turrets.
- Subjectively Improved Fonts replaces all fonts in case you’re tired of the vanilla ones.
- Discord Rich Presence adds more details to the Discord game activity feature. Shows your player name!
- Unscrappable Tools makes ballpen hammers, adjustable wrenches, etc, unscrappable so it is easier to save them up for quests, crafting, or building.
Creation Club
The only Creation supported by WTP is fadingsignal’s Modular Military Backpack which is the perfect companion to the K-9 Harness (also by fadingsignal). I removed the levelled list distribution so there is only a single backpack in the world which you will come across very early on in the game in Vault 111.
If you own the Modular Military Backpack CC, you can install it for WTP by following these steps:
- Navigate to the mods folder within your Mod Organizer 2 instance:
\Welcome To Paradise\mods\. - Create a new folder named “[NoDelete] Creation Club - Modular Military Backpack”.
The [NoDelete] prefix will ensure that the mod is not deleted after updating WTP.
- Retrieve the plugin and archives for the Creation from your CC backups folder:
ccfsvfo4001-ModularMilitaryBackpack.esl
ccFSVFO4001-ModularMilitaryBackpack - Main.ba2
ccFSVFO4001-ModularMilitaryBackpack - Textures.ba2
- Copy all three files into the new “[NoDelete] Creation Club - Modular Military Backpack” folder.
- Back in Mod Organizer 2, press F5 to refresh.
- The new mod will appear at the bottom of your mod order (left pane).
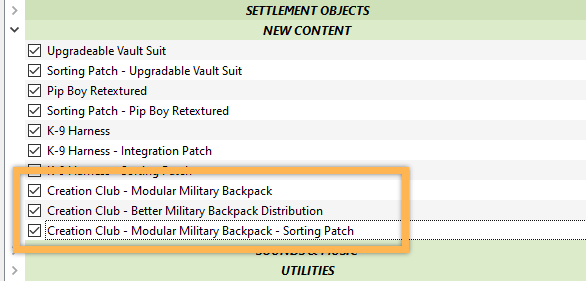
- Drag it up below the NEW CONTENT separator and activate it.
- Also activate the patches for the Creation under the same separator.
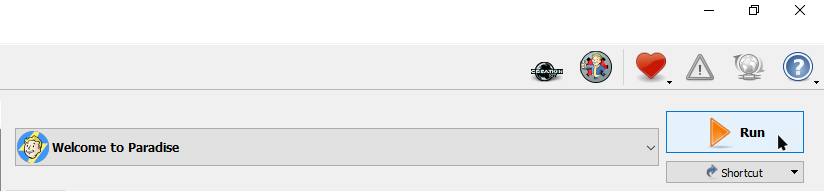
Launching the game
To play WTP you must launch f4se_loader.exe through Mod Organizer 2; otherwise your mods will not work. When you open Mod Organizer 2, F4SE (renamed to Welcome to Paradise for your convenience) should be selected automatically in the executables drop-down and you can start the game by clicking Run. l
Starting a new save
- In the main menu, click NEW to start a your playthrough.
- Press F10 to temporarily toggle off ENB. It may look strange during the intro video and prologue.
Shortly after the character creation, you will get a prompt which is added by the mod Start Me Up. You will be asked whether you want to “relive the memory”, giving you the option to skip the prologue. Do not select this option if you never played Fallout 4 before, you are going to miss some important things.
If you want to play the regular Fallout 4 intro (highly recommended), click “This is a memory. Let’s stay here a while” and the prologue will play out as usual. Proceed to the Mod Configuration page after exiting the vault.
Start Me Up
Intro spoilers ahead.
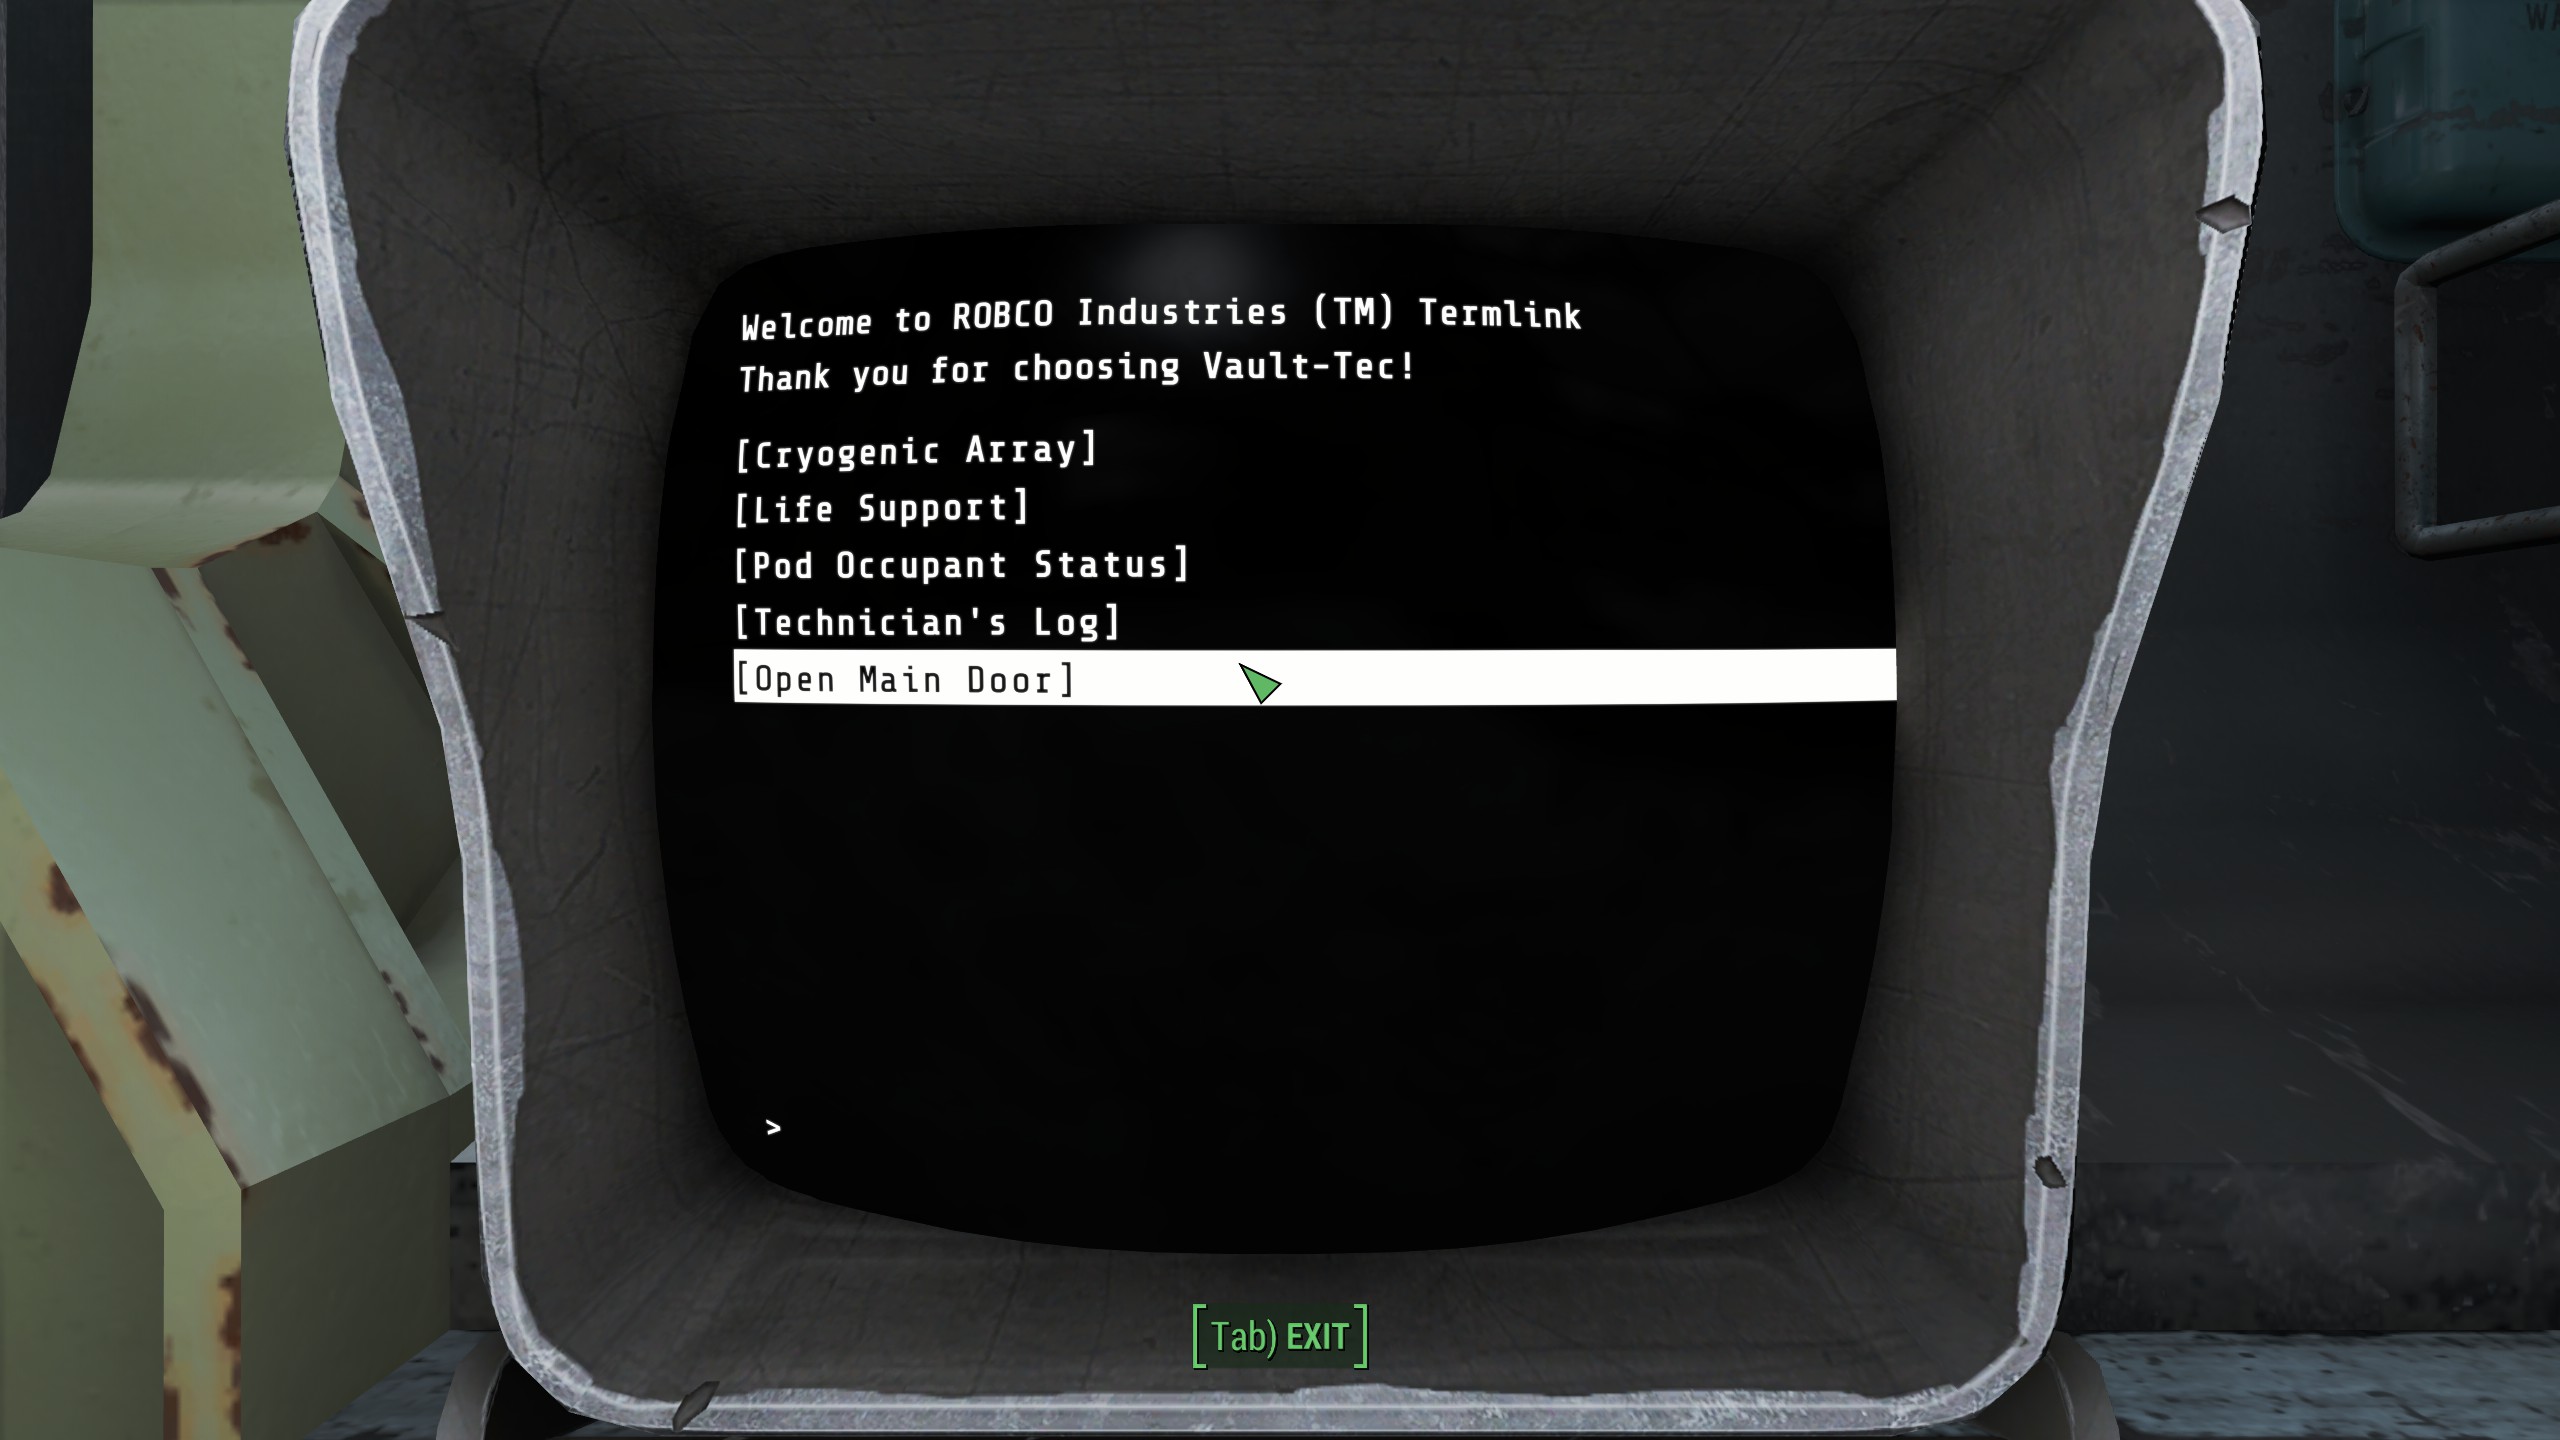
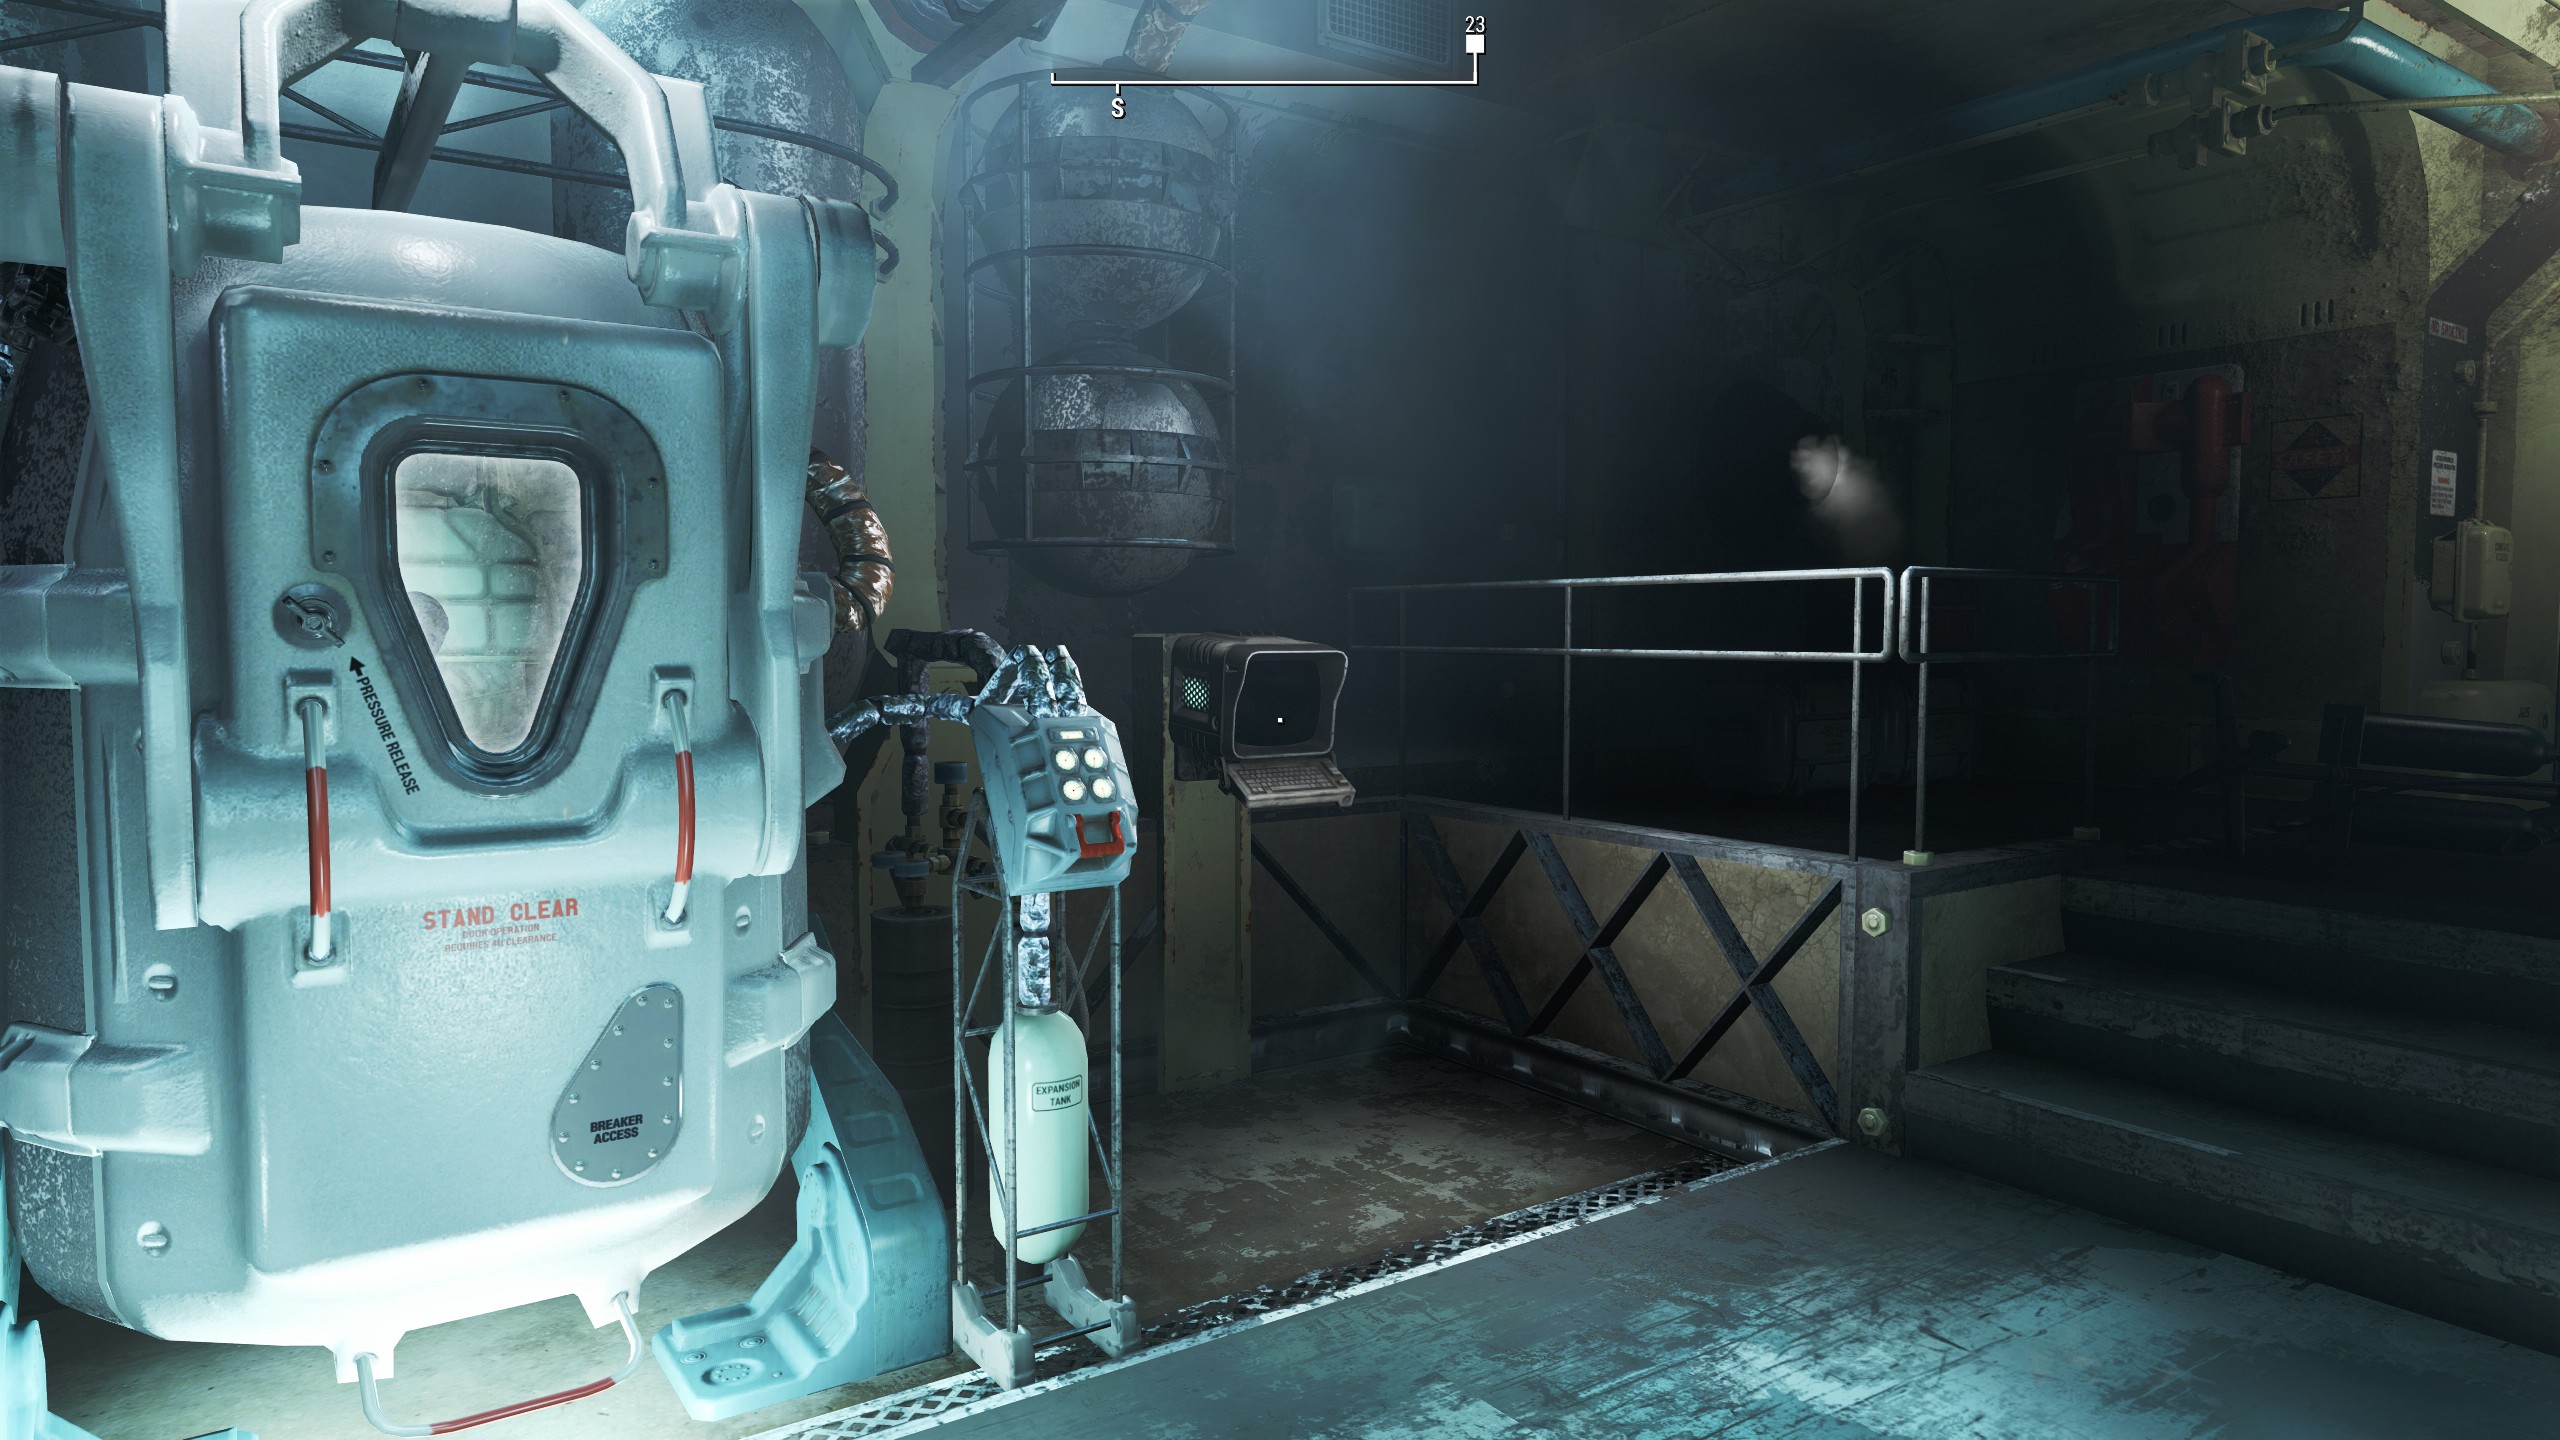
If you do choose to skip the prologue because you have played it a hundred times already, select the second option: “This is a memory. I don’t want to relive this.". After a fade-to-black, you will find yourself waking up inside the cryo pod shortly after a certain someone shot your spouse. Note that the door to the hall is locked until you interact with the terminal (left of the door), configure your SPECIAL stats and enter a name.
Interact with the terminal:
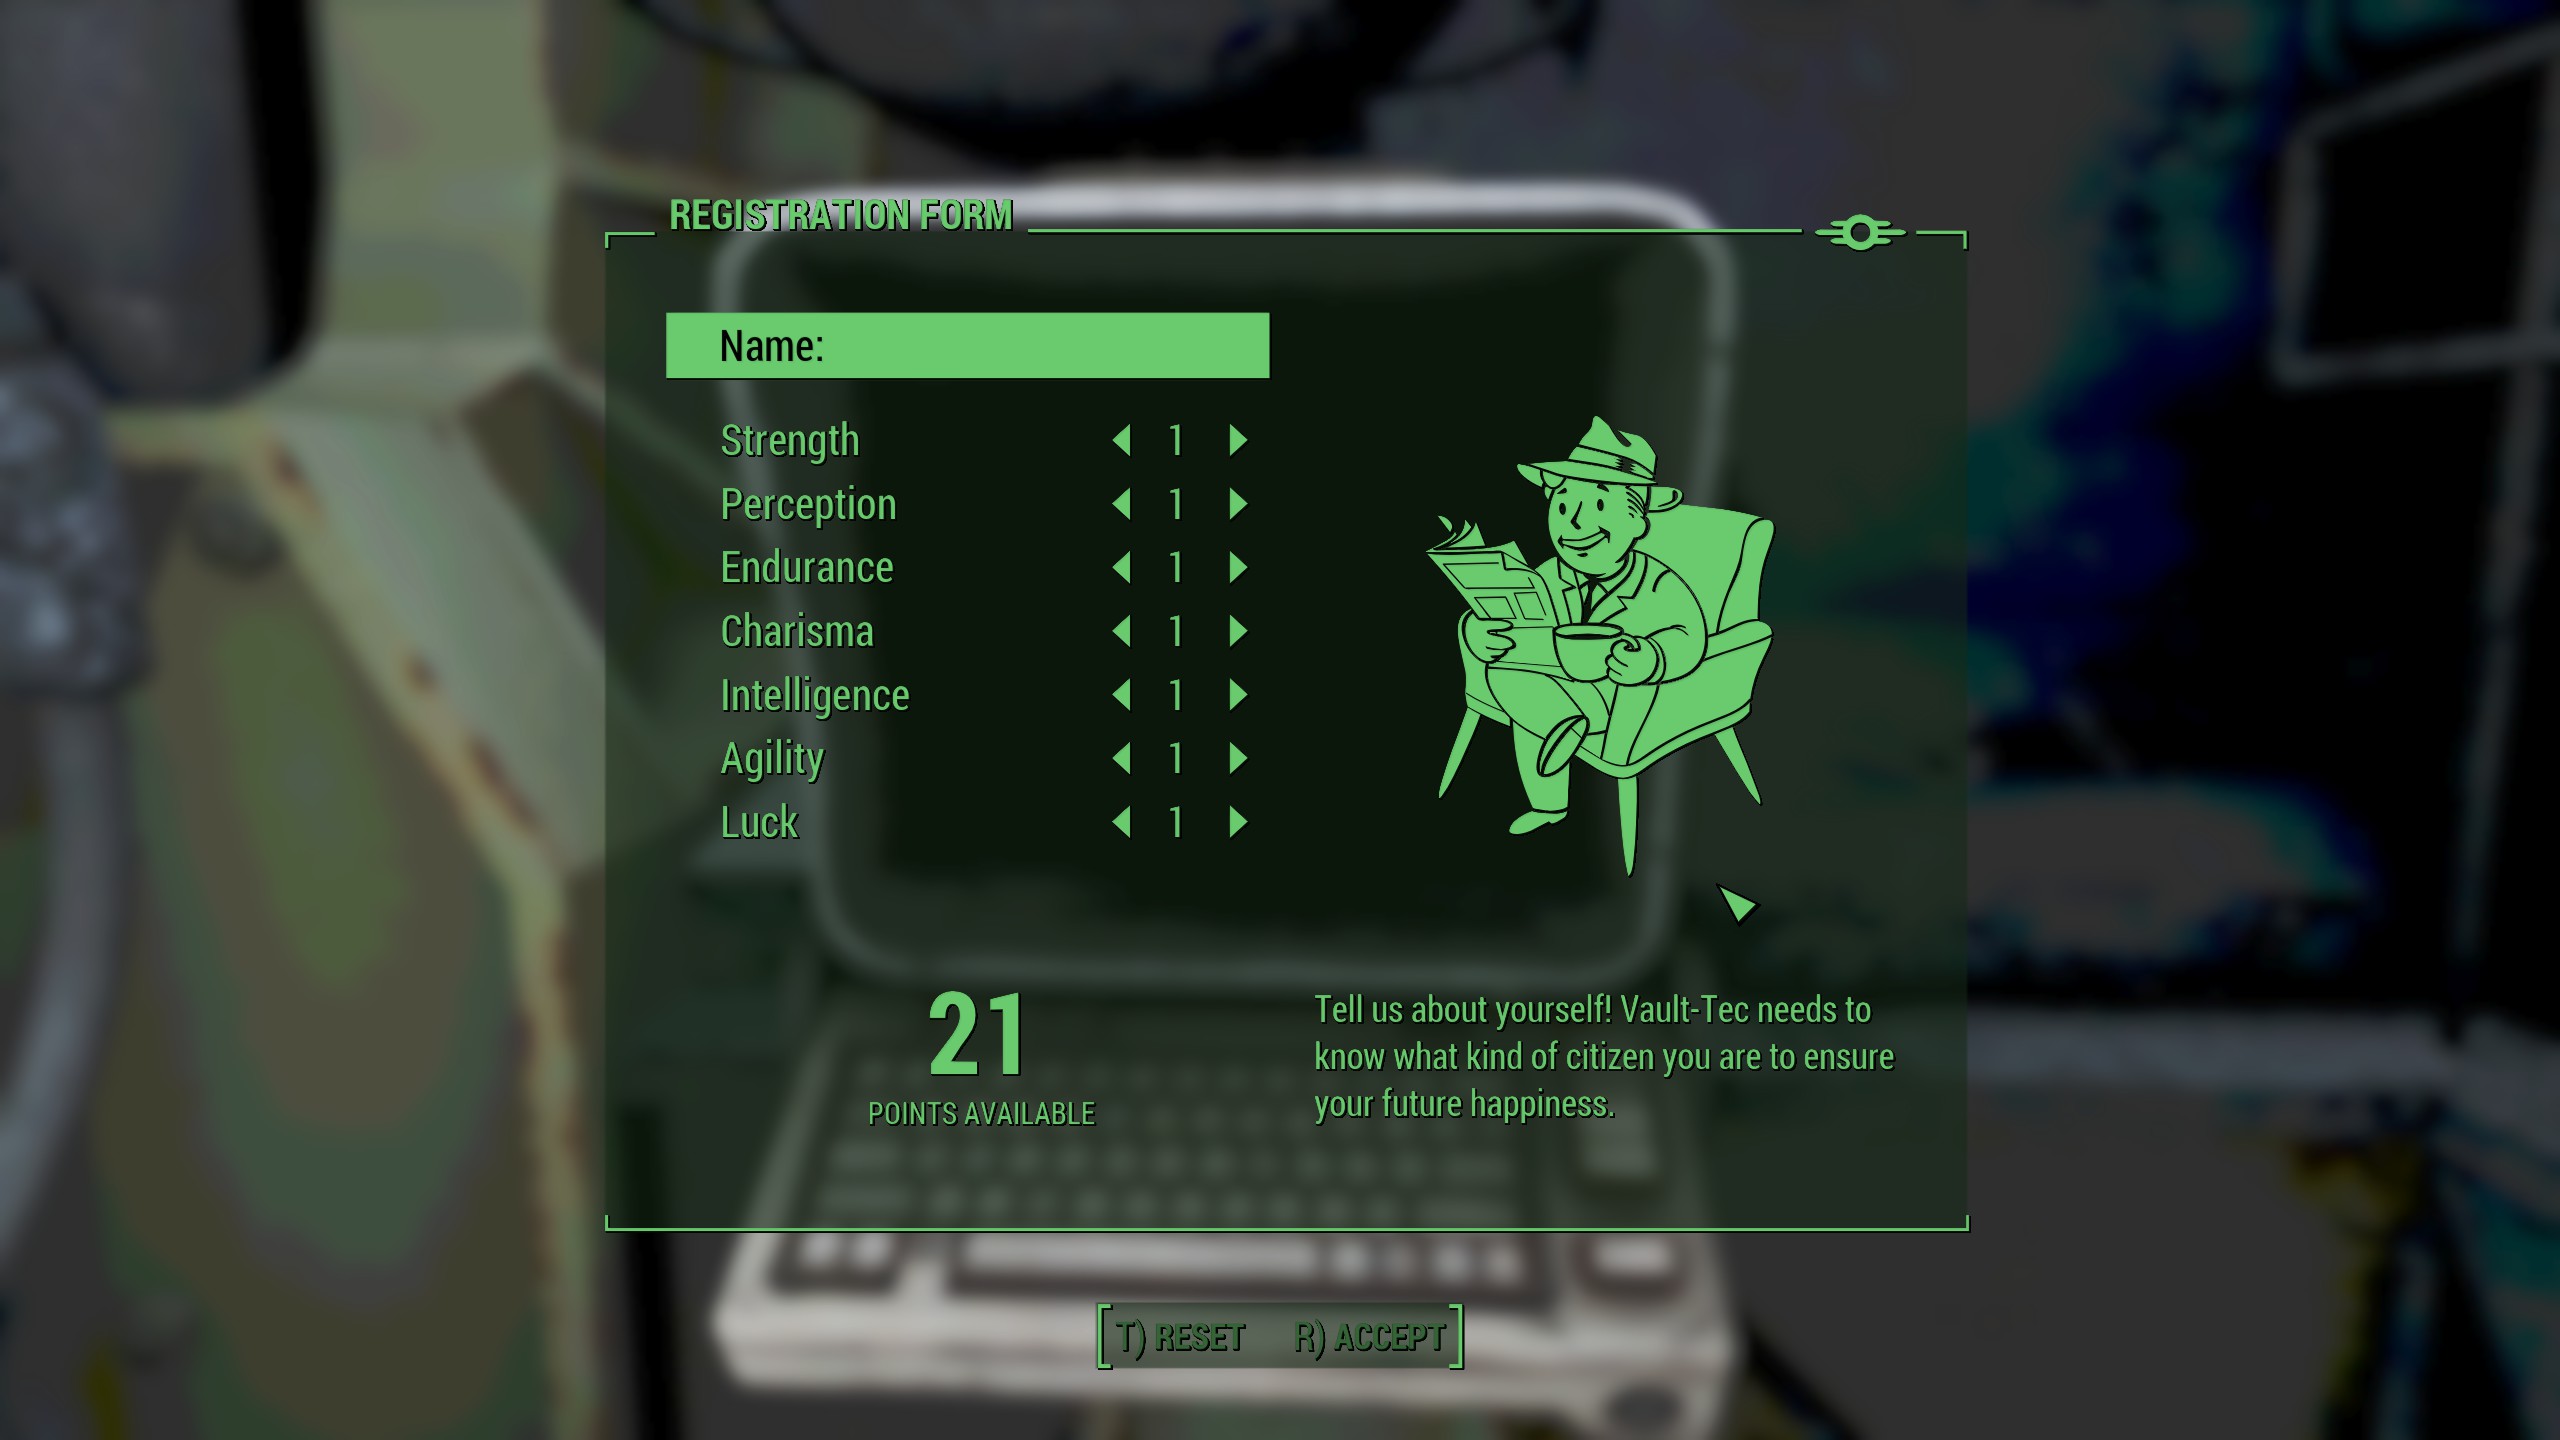
Select your SPECIAL stats and enter your name:
Open main door through the terminal: