SSEEdit
Summary
This module covers the installation of SSEEdit for Mod Organizer 2.
Prerequisite(s): Mod Organizer 2, Tools Folder
About SSEEdit
xEdit is a tool for viewing and modifying Bethesda plugins.
Versions of it exist for most Bethesda games, not only Skyrim SE, and its name changes depending on the game: For example, xEdit for Skyrim SE is known as SSEEdit while xEdit for Skyrim LE was called TES5Edit and FO4Edit is used in Fallout 4 modding.
Once you have installed the programme, you can use it for any game that is supported by either changing the name of the executable, or starting it with a specific argument such as -sse for Skyrim SE.
Installation
SSEEdit is hosted on the Nexus:
- Download the latest version of SSEEdit.
- Create a folder called SSEEdit in your Tools folder.
- Extract the downloaded archive into the new folder.
MO2 Integration
Plugins are data folder files which means SSEEdit must be run through Mod Organizer 2 in order to access its virtual data folder.
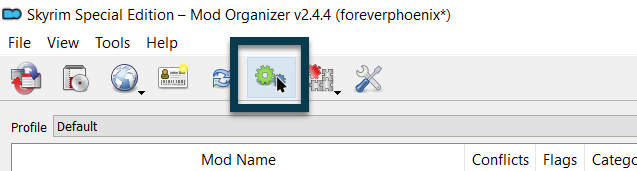
- In Mod Organizer 2, click the gears icon in the Toolbar to open the Executables settings.
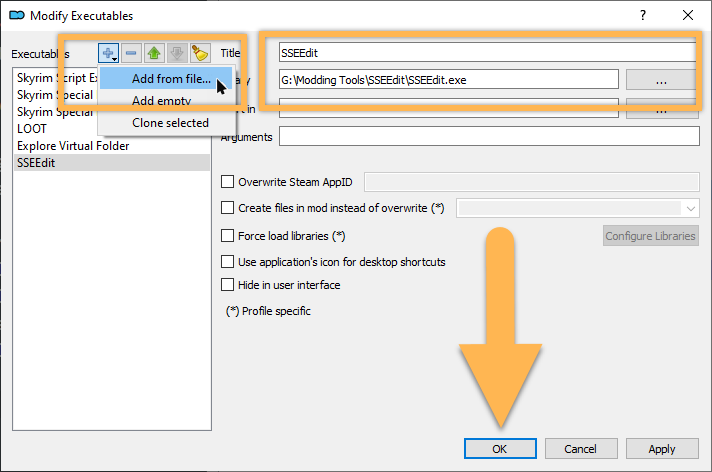
- Click the small blue plus icon and select Add from file.
- Navigate to
\Tools\SSEEdit\and double-click SSEEdit.exe. - Click OK to add the executable to Mod Organizer 2.
Toolbar
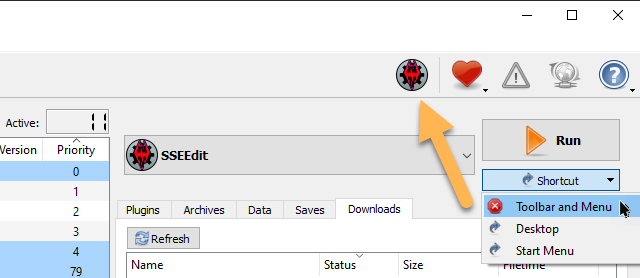
SSEEdit should be automatically selected in the executables drop-down (if not, select it).
For maximum convenience, I recommend clicking the Shortcut drop-down below the Run button and selecting Toolbar and Menu.
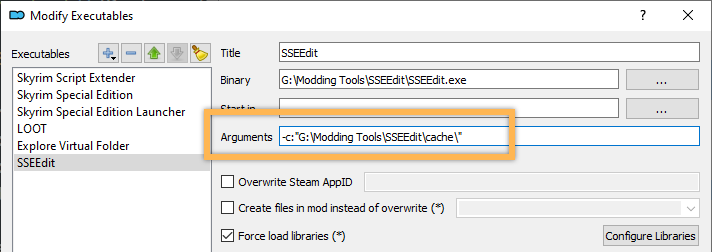
SSEEdit Ref Cache
When loading up your plugins in SSEEdit, the tool will spend a considerable amount of time processing all records. To cut down on the loading time, SSEEdit creates a ref cache (caching reference records for each plugin) which reduces the startup time from several minutes to twenty seconds or less.
I recommend saving the cache files into the SSEEdit folder.
- In Mod Organizer 2, click the gears icon in the Toolbar to open the Executables settings.
- Select SSEEdit in the list of executables.
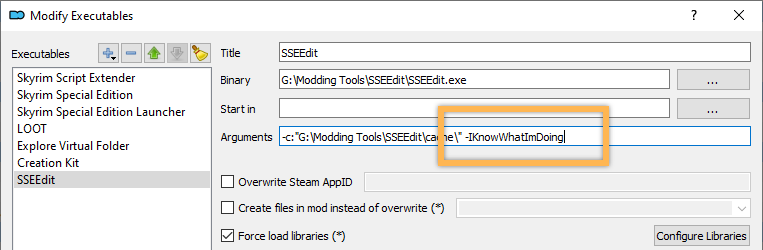
- Under Arguments add the
-c:"filepath"argument along with the file path.
Your file path will, of course, depend on where you installed SSEEdit. It must end in a \cache\ folder. This folder does not have to exist, it will be created by SSEEdit upon generating the first cache files. The file path must end on a trailing backslash.
For me, the argument looks like this:
-c:"G:\Modding Tools\SSEEdit\cache\"
Generating Ref Cache
Launch SSEEdit through Mod Organizer 2 and click OK in the Plugin Selection Window to load all your currently installed plugins. This will take a moment as SSEEdit builds the cache files.
You can quit once the log at the bottom returns Background loader: finished or once you are prompted to activate ModGroups.
Check your \Tools\SSEEdit\cache\ folder to make sure the files were saved to the correct location.
Quick Auto Clean
I recommend you also install the Quick Auto Clean executable in case you ever need to clean plugins.
- In Mod Organizer 2, click the gears icon in the Toolbar to open the Executables settings.
- Click the small blue plus icon and select Add from file.
- Navigate to
\Tools\SSEEdit\and double-click SSEEditQuickAutoClean.exe. - Click OK to add the executable to Mod Organizer 2.
*I like to rename the executable to “SSEEdit QAC” in the MO2 executables settings for better readability.*
-DontCache
When cleaning Dragonborn.esm with SSEEdit QAC, parts of Apocrypha will unintentionally be modified. This can be prevented by adding the -DontCache argument to the QAC exe.
- In Mod Organizer 2, click the gears icon in the Toolbar to open the Executables settings.
- Select SSEEdit QAC in the list of executables.
- Add
-DontCacheunder Arguments. - Click OK to save your change and close the window.
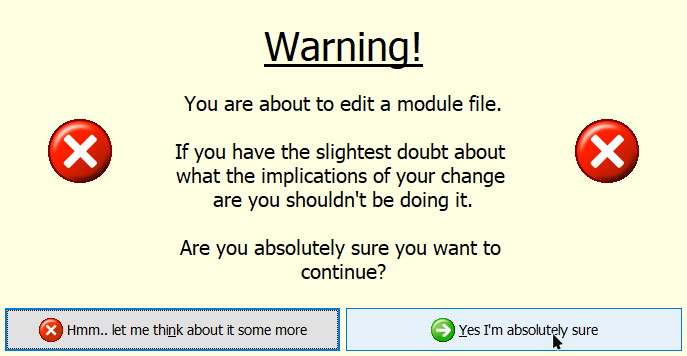
Disable Warning
To prevent the warning window from appearing when trying to modify a record, add the following argument to the executables settings in Mod Organizer 2:
-IKnowWhatImDoing