Various Tutorials
How to find Skyrim LE BSAs in MO2
Attempting to run Skyrim SE while a BSA compiled in the Skyrim LE Creation Kit is loaded, will result in an instant crash. These BSAs always have to unpacked and deleted. You can repack the loose files with the SSE Creation Kit but it’s not usually necessary. If you encounter a crash upon launch, you may have missed an instruction to unpack and delete a Skyrim LE BSA. This can easily be narrowed down using MO2’s filters.
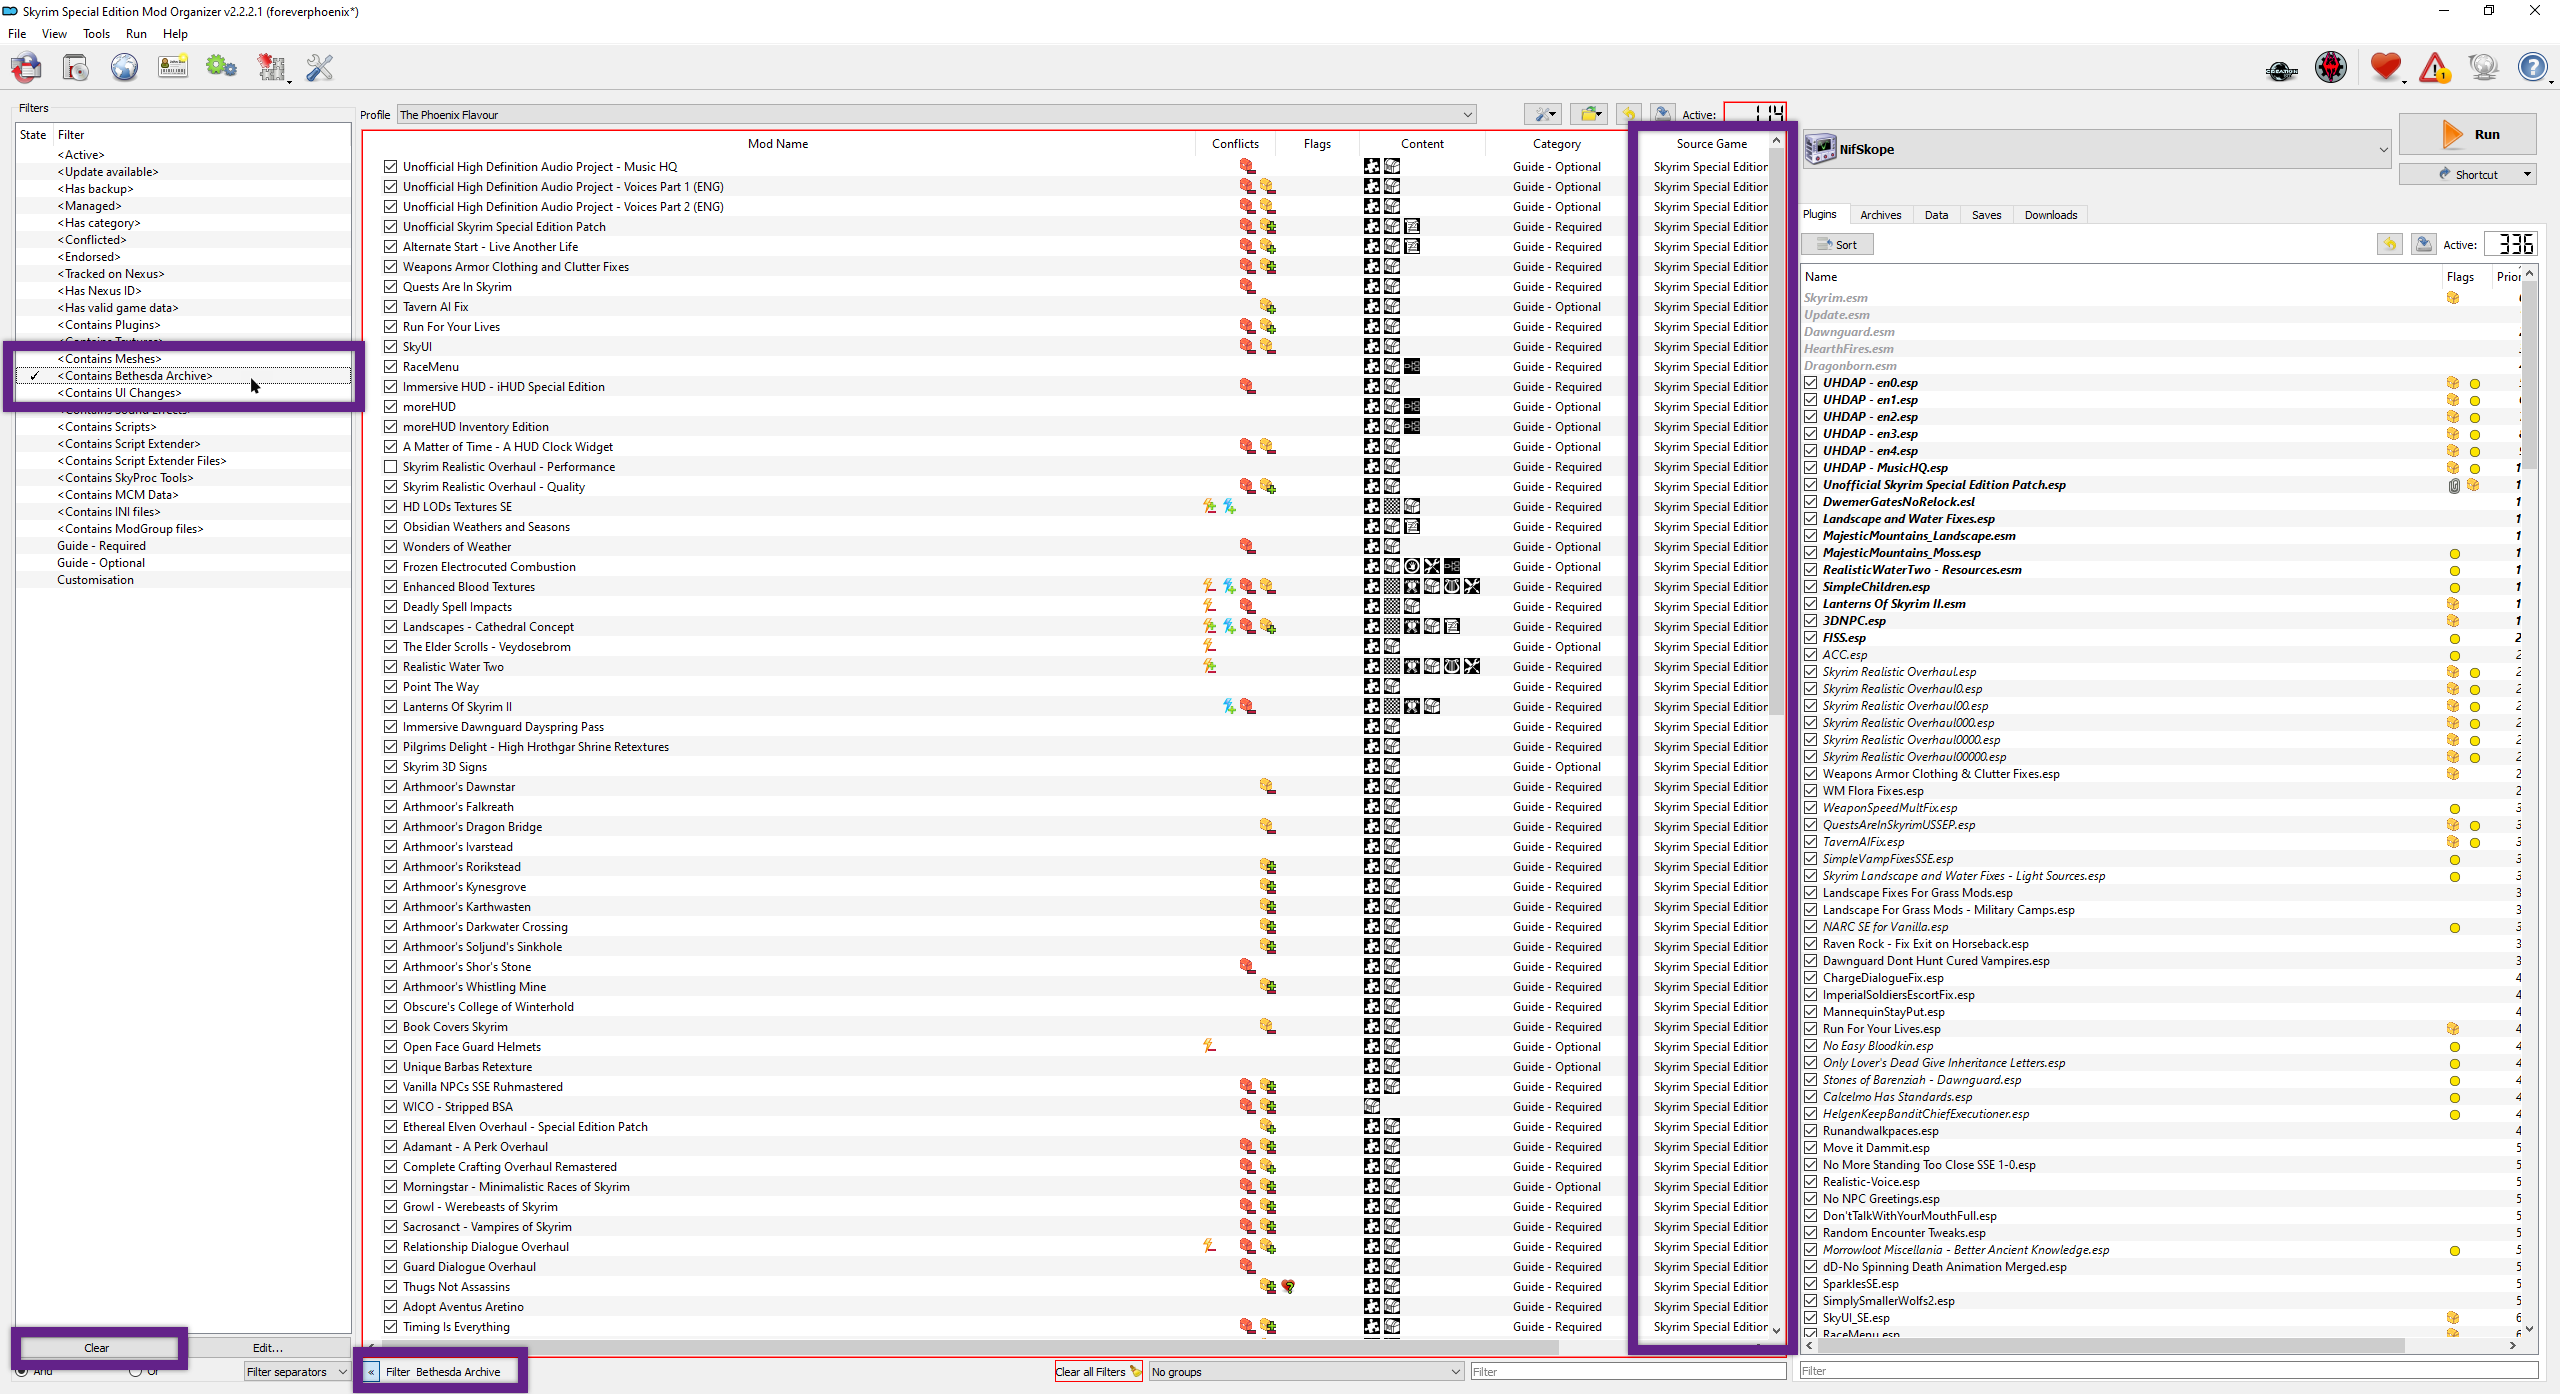
Any such mod would be downloaded from the Skyrim LE Nexus and will display Skyrim in the MO2 Source Game column (Skyrim SE mods appear as Skyrim Special Edition). You can filter for mods containing BSAs in Mod Organizer 2 and see if any of them have Skyrim as their source game.
- In Mod Organizer 2, click the arrows button
<<way down in the bottom left to open the Filter settings. - Select the <Contains Bethesda Archives> filter to only display mods containing BSAs.
- Scroll through the resulting list and check if any of the displayed mods have Skyrim as their source game.
- If you find one, unpack the BSA and delete it.
- The loose assets might need optimizing with CAO (check the guide instructions for the mod).
- To disable the filter again, click the Clear button at the bottom and close the filter settings by clicking the arrows
<<.
How to re-generate INI files from scratch
Re-doing INI files from scratch can be necessary when BethINI got an update. It can also help when you get a crash upon launch or when starting a new game caused by faulty INI edits. This is how to easily re-do INIs on a TPF setup.
- In MO2, click the folder icon to the right of the profiles selection drop-down
- Select Open Profile folder (see screenshot).

- Delete the following folder and files:
- BethINI Cache
- Skyrim.ini
- SkyrimPrefs.ini
- Navigate to
C:\Users\Username\Documents\My Games\Skyrim Special Edition. - Copy the Skyrim.ini and SkyrimPrefs.ini located inside this folder, they are completely untouched and vanilla.
- Paste both files into the profiles folder.
Now all you have to do is close Mod Organizer 2, launch BethINI and follow the instructions under Setup, Step 6.3.
If you run more than one profile (Base TPF, TPF Customised, Playthrough), you can simply copy the tweaked INI files from your Base TPF profiles folder into the folders of the other profiles after re-running BethINI, and replace the existing ones.
How to change the game’s resolution
The majority of users most likely play on Full HD monitors with the standard 1080p resolution of 1920x1080 pixels. This is what I recommend for TPF. A higher resolution will heavily impact performance, especially on weaker machines. If you want to edit your game’s resolution, please do so through Mod Organizer 2 and not the game’s launcher. Note that this will only change the resolution for the profile you have currently selected as we are using profile-specific INI files. You can change the resolution at any time.
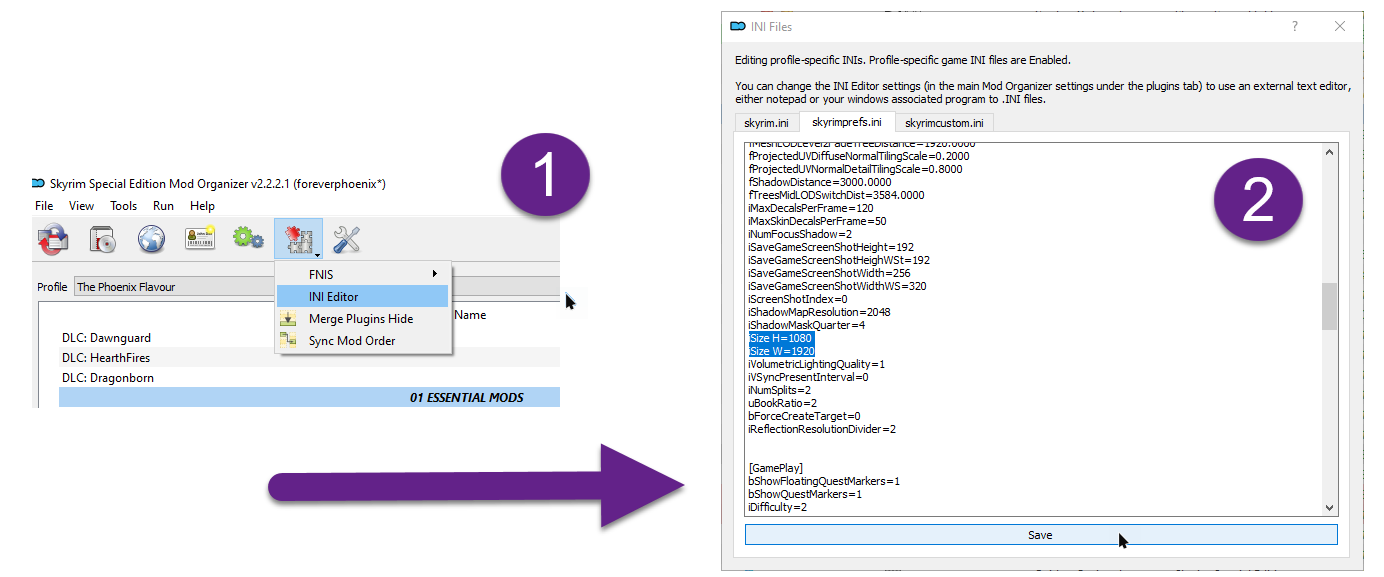
- In Mod Organizer 2, open the INI editor.
- Switch to the skyrimprefs.ini tab which contains the necessary settings.
- Scroll down to the
[Display]section and edit the following two lines:
iSize H=1080
iSize W=1920
- Afterwards, click the Save button and close the window.
How to add the No Decal flag to meshes
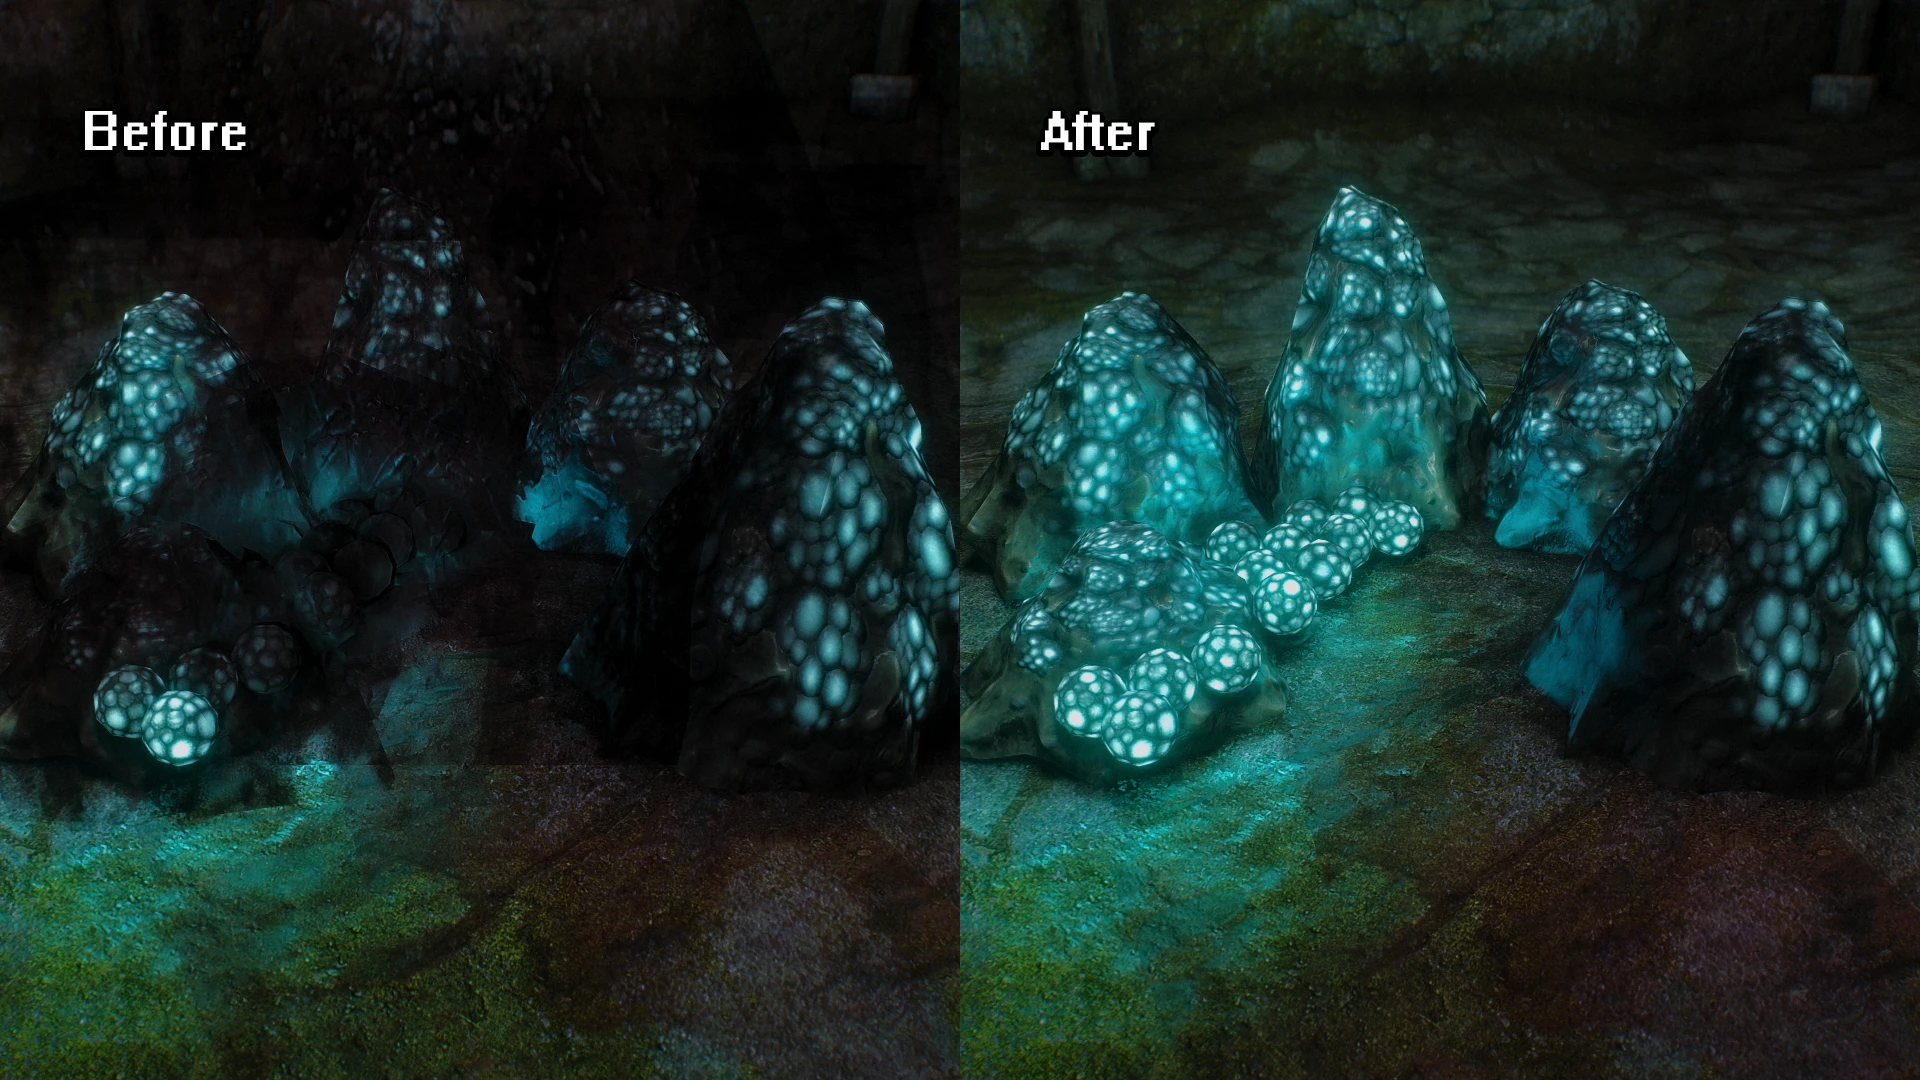
In their Rudy ENB - More Lights for ENB series, Rudy added particle light effects for ENB to various meshes. Unfortunately, the ENB light nodes did not have the No Decal flag added to them, meaning blood decals can be applied to them which looks rather ugly. The meshes were fixed by wankingSkeever here, however, for the purposes of the guide, we will be fixing those meshes ourselves with NifSkope (and get to know the tool in the process).
These instructions are linked to at relevant points in the guide.
- Right-click the mod you were instructed to edit and select Open in Explorer.
- Find the NIF files (meshes) in the meshes folder. These need editing.
- Run NifSkope through Mod Organizer 2.
- Open the first mesh into NifSkope (drag from Windows Explorer into the tool).
- Expand the BSFadeNode (see window in the upper left).
- The EnbParticleLight node is at the bottom of the list. Expand it.
Sometimes the EnbParticleLight node is nested within other nodes in which case you need to expand those first. The quickest way to get to the correct node is often clicking the mesh which will usually select the EnbParticleLight node and move you to the BSTriShape.
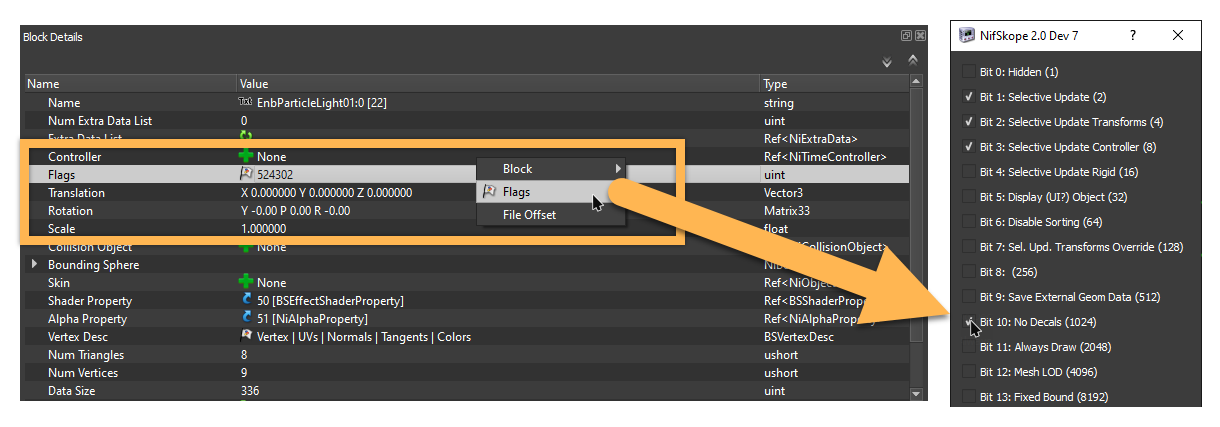
Here we see the BSTriShape settings which is what we need to edit:
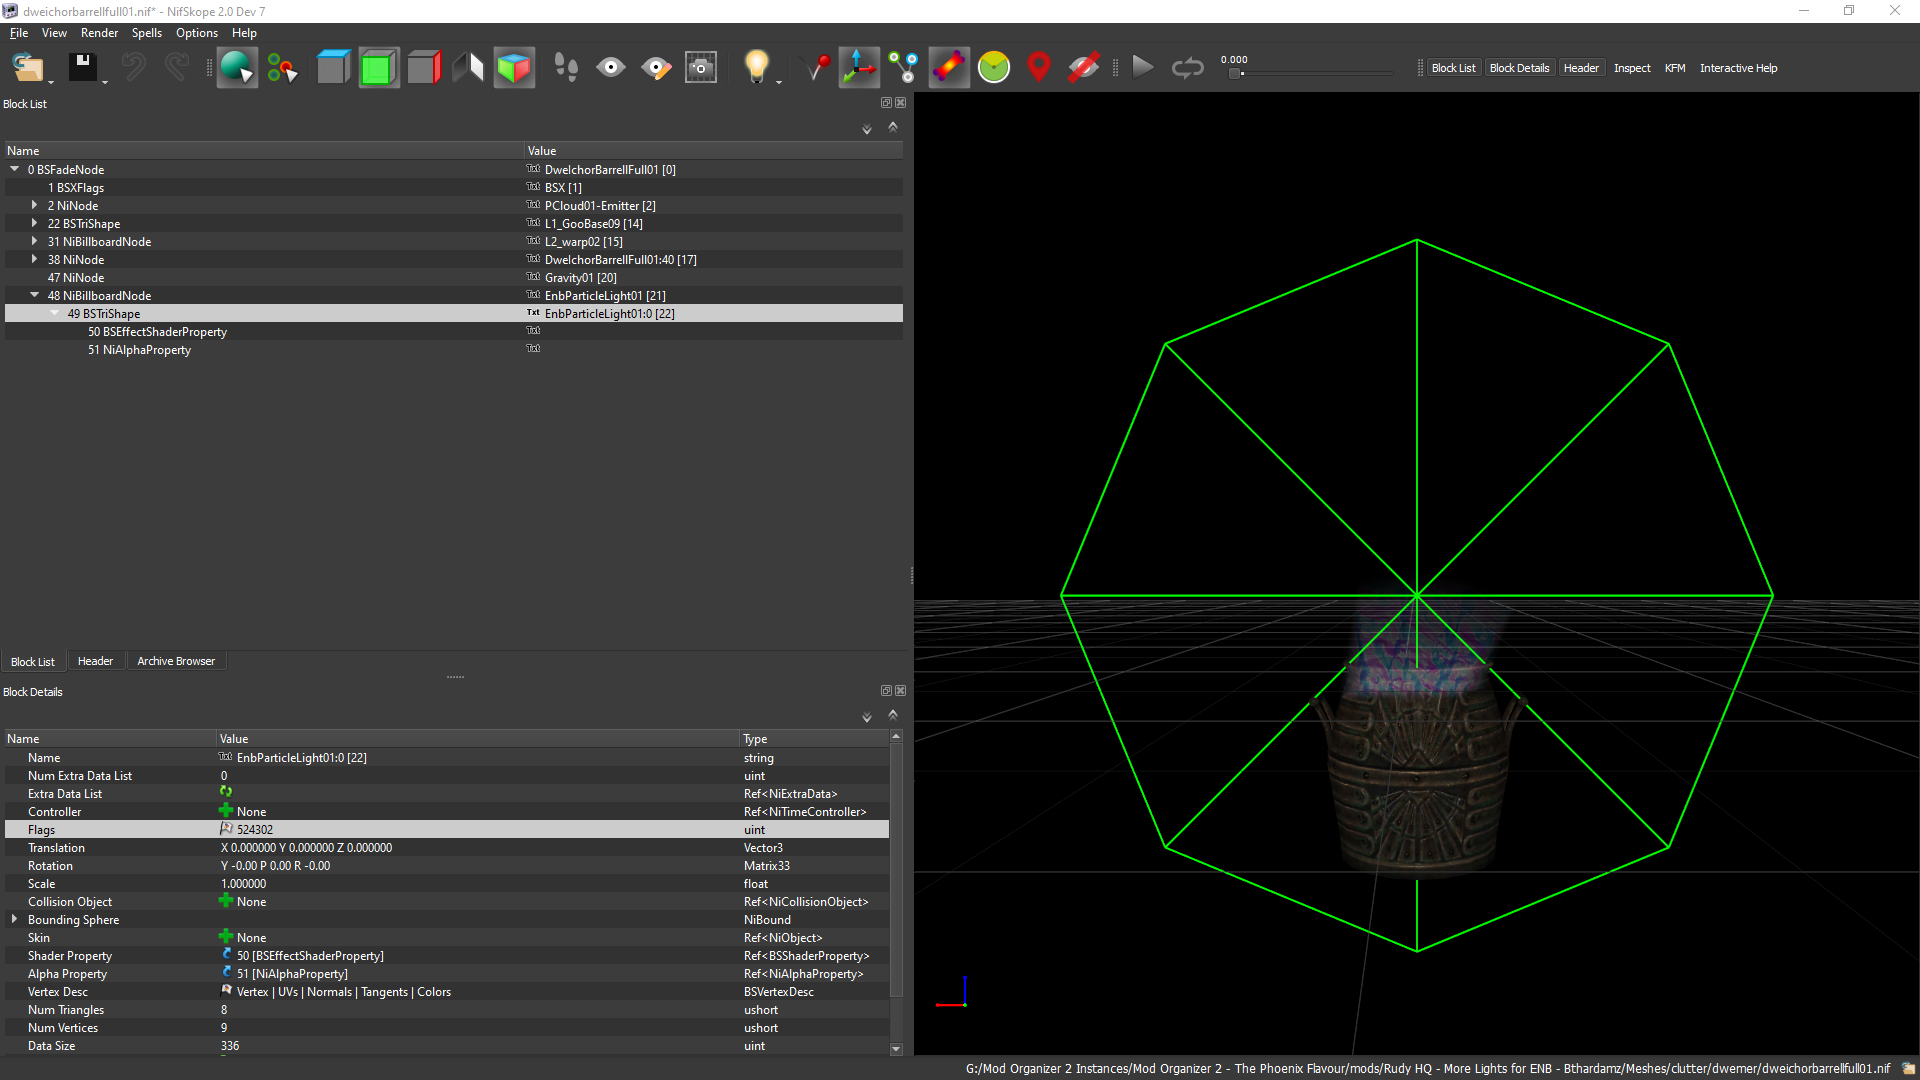
- Below the node list in the bottom left, you can see the Block Details.
- Right-click the Flags line and select Flags to edit them.
- Click Yes in the warning window.
- In the Flags window, check the box for Bit 10: No Decals (1024) and click Accept.
And that’s it! Press CTRL + S to save your edits and close NifSkope. The first mesh is fixed.