Skyrim Script Extender
Summary
This module covers the Skyrim Script Extender, including the importance of Skyrim versions as well as the installation of SKSE with Root Builder and of related mods.
Prerequisite(s): Mod Organizer 2, Root Builder
The Skyrim Script Extender
If you have any previous modding experience at all, you will likely have heard of the Skyrim Script Extender, or SKSE for short. Of all the mods and tools out there, the Script Extender is definitely among the most vital ones: It extends the scripting capabilities of the engine, allowing mod authors to implement features that would not have been possible otherwise.
A popular example of an SKSE-dependent feature is the Mod Configuration Menu, or MCM for short, which is part of the UI overhaul mod SkyUI. There are also a multitude of SKSE-based plugins which, among other things, fix engine-level bugs that could not have been addressed otherwise.
SKSE and Skyrim Updates
All updates to Skyrim SE change the main executable, SkyrimSE.exe, which requires the Script Extender to be updated in turn because it is version-dependent and will only work with the specific version of Skyrim SE it was compiled for. For example, SKSE SE version 2.0.20 functions only with the last pre-Anniversary Edition version of Skyrim SE, 1.5.97. The new SKSE AE was made for the post-AE versions of Skyrim SE.
Whenever Skyrim updates, the modding community tends to catch up within a few weeks to months. Staying indefinitely on an older version will eventually mean that you cannot use newer mods or update existing mods. Therefore it makes sense to move on to the current version once all (or at least most) of the mods in your setup have been updated.
- Skyrim SE 1.5.97: Last pre-AE version of Skyrim SE (requires SKSE 2.0.20)
- Skyrim SE 1.6.317: Skyrim SE patch that accompanied the AE release (requires SKSE 2.1.0)
- Skyrim SE 1.6.353: Post-AE version of Skyrim SE with most mods ported (requires SKSE 2.1.5)
- Skyrim SE 1.6.640: Current version of Skyrim SE (requires SKSE 2.2.3) « this is what we are running
(Full Skyrim SE version history with changelogs.)
The issue of version dependency not only affects SKSE and the base game, but also SKSE and SKSE plugins. While some SKSE-dependent mods only use functions added by SKSE in their scripts and do not require a specific version of SKSE to actually work, there are also the so-called SKSE plugins*. These files with the .DLL extension are dependent on a specific SKSE version the same way SKSE is dependent on a specific Skyrim SE version.
**SKSE plugins (DLLs) are not to be confused with Skyrim plugins (ESMs, ESPs, ESLs). The former are written in C or C++ and specific to the Script Extender. The latter are created in the Creation Kit or community-made tools, and specific to Creation Engine games.*
Downloading SKSE
Before we install SKSE, we need to know which version of the game we are running by performing a Skyrim Version Check.
Please also follow the instructions for Update Proofing Skyrim.
Once we figure out which version of Skyrim we have installed, we know which version of SKSE to grab. The Script Extender is available on its official website and on the Nexus.
- Download the Skyrim Script Extender for Steam from the Nexus page.
The current version of SKSE for AE, build 2.x.x, should correlate with the current Skyrim SE version, runtime 1.6.xxx.
Installing SKSE
SKSE is an unusual mod in that it consists of both root folder files and data folder files. We will use the Root Builder plugin in order to manage all parts of the mod in Mod Organizer 2.
New Separator
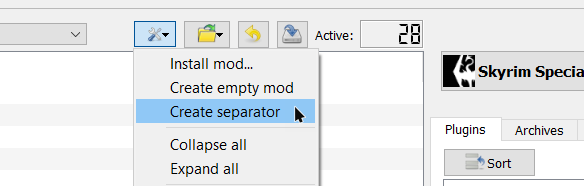
For the next batch of mods, we will want a new separator:
- Create a new separator in Mod Organizer 2 (reference picture) and name it Script Extender.
- Leave it at the bottom of the left pane, below the Creation Club separator.
Root Folder Files
To manage SKSE through MO2, we first need a new mod folder.
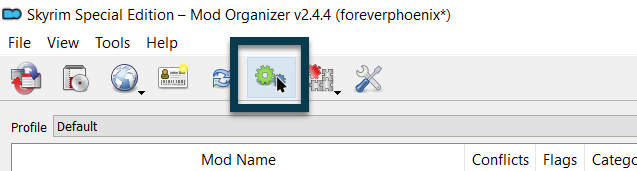
- In Mod Organizer 2, click the crossed tools icon above the mod order and select Create empty mod.
- Enter Skyrim Script Extender as the name and click OK.
- Right-click your new mod in the mod order and select Open in Explorer.
- In the Explorer, right-click and select New » Folder (or press Shift + CTRL + N).
- Name the new folder Root and open it.
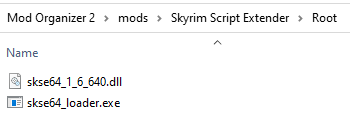
\Mod Organizer 2\mods\<Mod Name>\Root\ into the root folder when launching an application through Mod Organizer 2 and removes them after the application is closed again.- Open the SKSE archive you previously downloaded.
- Extract skse64_1_6_xxx.dll and skse64_loader.exe to
\Mod Organizer 2\mods\Skyrim Script Extender\Root\.*
**There used to be a third DLL, skse64_steam_loader.dll, that was part of SKSE but is no longer required as of SKSE 2.2.3.*
Back in Mod Organizer 2, the new Skyrim Script Extender mod will be greyed out because MO2 does not recognise the Root folder as a valid mod directory. This is just a UI limitation and nothing to worry about.
- Right-click the new mod and select Ignore missing data.
- Check the box to activate it.
SKSE Executable
A minor disadvantage of adding SKSE in this fashion is that MO2 will not automatically recognise it. We need to set up the executable manually.
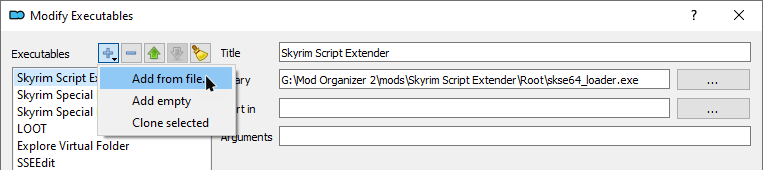
- Open the Executables settings in Mod Organizer 2.
- Click the small blue plus icon and select Add from file.
- Navigate to
\Mod Organizer 2\mods\Skyrim Script Extender\Root\and double-click the skse64_loader.exe. - (Optional) Rename the executable in MO2 to Skyrim Script Extender and move it to the top of the list.
- Click OK to save your changes and close the window.
SKSE Scripts
Going back to the downloaded SKSE archive, you will notice two folders inside: Data and src. The latter is short for “source”, meaning it contains the source code for mod authors which we do not need.
The Data folder contains scripts which are a required component of SKSE. Those scripts are regular assets belonging into the data folder and can therefore be handled by Mod Organizer 2 as usual. We can add them to the existing Skyrim Script Extender mod folder.
- Inside the downloaded SKSE archive, double-click the Data folder.
- Extract the Scripts folder to
\Mod Organizer 2\mods\Skyrim Script Extender\.
When you now launch SKSE through Mod Organizer 2, the executable and two DLLs will be temporarily copied into the actual root folder by the Root Builder plugin.
Meanwhile, the scripts will be loaded in MO2’s virtual data folder and recognised by the game just as if you had installed them directly into the actual data folder. Unchecking the mod in MO2 is sufficient to completely disable it.
SKSE INI
Two of SKSE’s features need to be enabled in an INI file:
iTintTextureResolution allows you to adjust the texture resolution of tint masks. By default, Skyrim’s tint masks (this includes war paints, make-up, or dirt masks applied to faces) can only have a resolution of 512 x 512 pixels which can look very blurry. Even if you install 2048 x 2048 pixel (2K) retextures, they will look like 512 x 512 in-game.
ClearInvalidRegistrations is intended to clean up orphaned OnUpdate() events and prevent saves from bloating or breaking as a result of uninstalling certain mods.
Creating SKSE INI
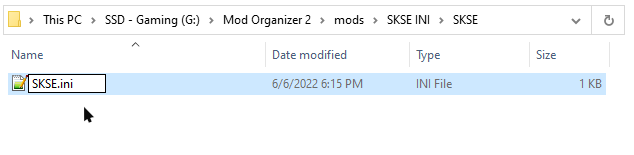
The SKSE INI must be located under \Data\SKSE\SKSE.ini. We can use Mod Organizer 2 and create it from scratch.
- Click the crossed tools icon above the mod order and select Create empty mod.
- Name the new mod Skyrim Script Extender - SKSE INI and click OK.
- Right-click the new mod and select Open in Explorer.
- Inside the new mod folder, create another new folder called SKSE.
- Within that SKSE folder, right-click and select New » Text Document.
- Rename the new file to SKSE.ini.
- Make sure to change the file extension from TXT to INI.
- After changing the file extension and confirming, a warning window will pop up. Click Yes.
SKSE INI Edits for SKSE
Next, we need to populate our new INI file.
- Go back into Mod Organizer 2 and press F5 to refresh.
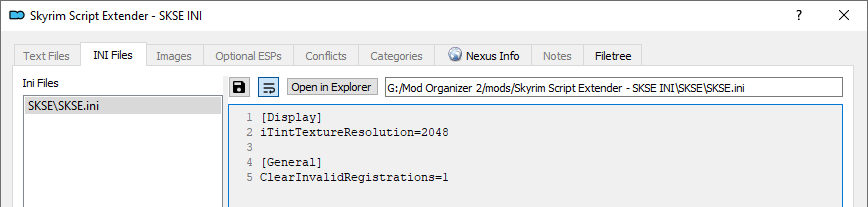
- Double-click SKSE INI in your mod order and switch to the INI Files tab.
- Select the
\SKSE\SKSE.inifile. - Copy and paste the following into the empty file:
[Display]
iTintTextureResolution=2048

[General]
ClearInvalidRegistrations=1
- Hit CTRL+S to save your edits and close the window.
- Check the box for the new mod to enable it.
Other SKSE INI Settings
Beyond the two settings that we added, there are other options that are largely relics of the SLE days.
One allows you to adjust memory allocation, but while memory was a real issue in Skyrim LE, the 64bit engine upgrade in Skyrim SE all but solved the problem. The settings were very recently enabled in SKSE for SE; however, most people use the memory manager from SSE Engine Fixes instead (another mod, to be installed soon).
[Memory]
DefaultHeapInitialAllocMB=
ScrapHeapSizeMB=
There is also an option to enable diagnostics. I am not entirely certain if this is valid in SKSE for SE to begin with (the changelog makes no mention of it), but it would be irrelevant anyway. What it logs are missing master files and missing plugins in a save. You will be able to see the former in Mod Organizer 2 and the latter upon attempting to load a save after disabling plugins that it relies on.
[General]
EnableDiagnostics=1
Address Library for SKSE
To alleviate the problem of SKSE and SKSE plugins breaking with every Skyrim update, meh321 (the author of a number of groundbreaking mods) released Address Library for SKSE. This modder’s resource allows SKSE plugins to become version independent from SKSE by storing their offsets in a separate database.
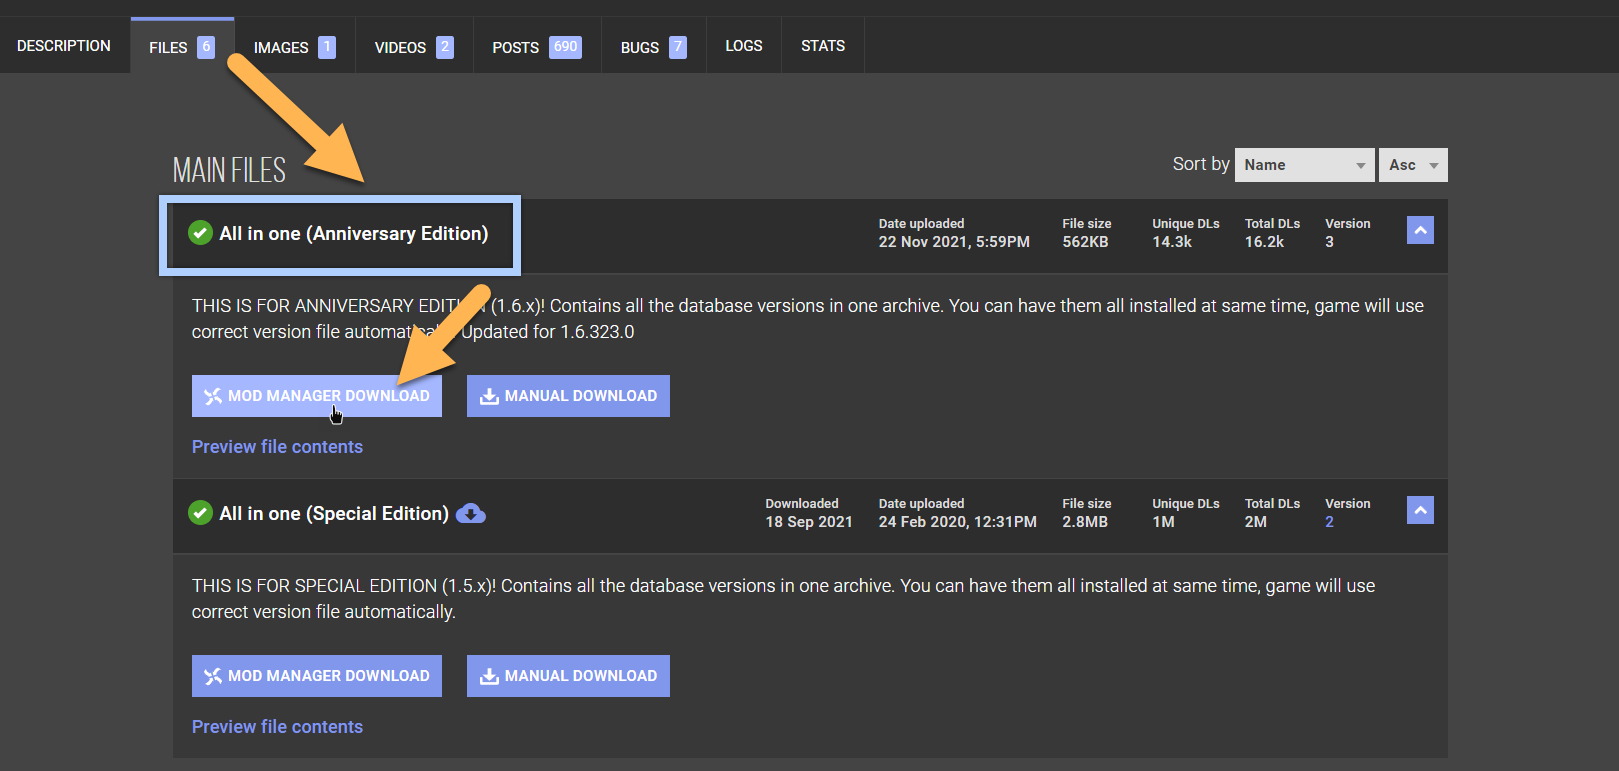
- Open the Nexus page for Address Library for SKSE and switch to the Files tab.
- Locate the All in one (Anniversary Edition) main file and click the Mod Manager Download button.
- In the right pane of Mod Organizer 2, switch to the Downloads tab.
- Double-click the downloaded file and click OK to install the mod.
- It will now appear in your mod order. Check the box to activate it.
Test Run
Finally, we should give SKSE a test run.
SKSE only functions properly if Skyrim SE is launched via skse_loader.exe.
Also remember that the game must always be launched via Mod Organizer 2 in order for it to recognise the virtual data folder.
- Make sure all new mods are checked in the left pane.
- Select the Skyrim Script Extender from the executables drop-down menu.
- Click Run to launch the Skyrim Script Extender through Mod Organizer 2.
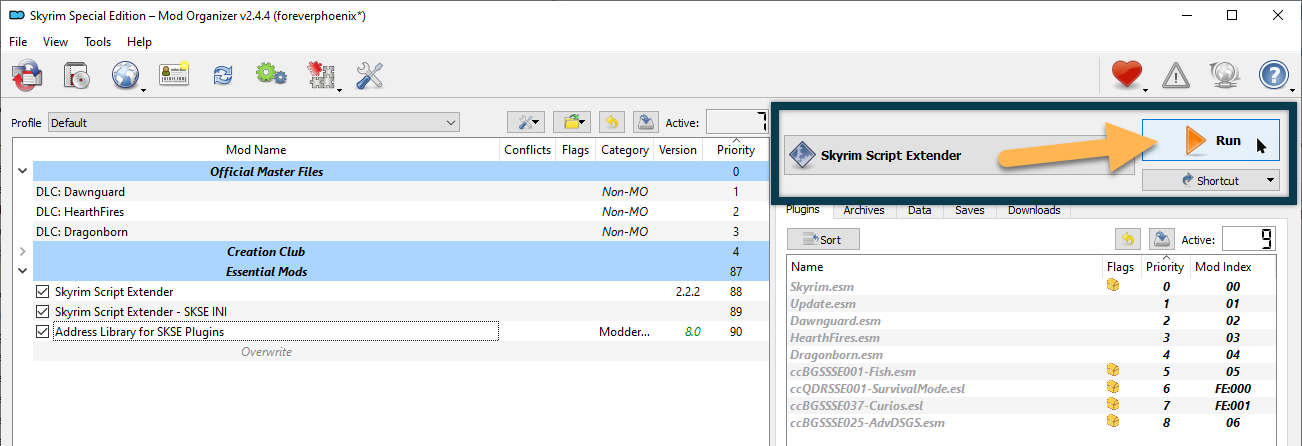
Instead of opening the launcher, running the game through SKSE will bring you into the main menu directly.
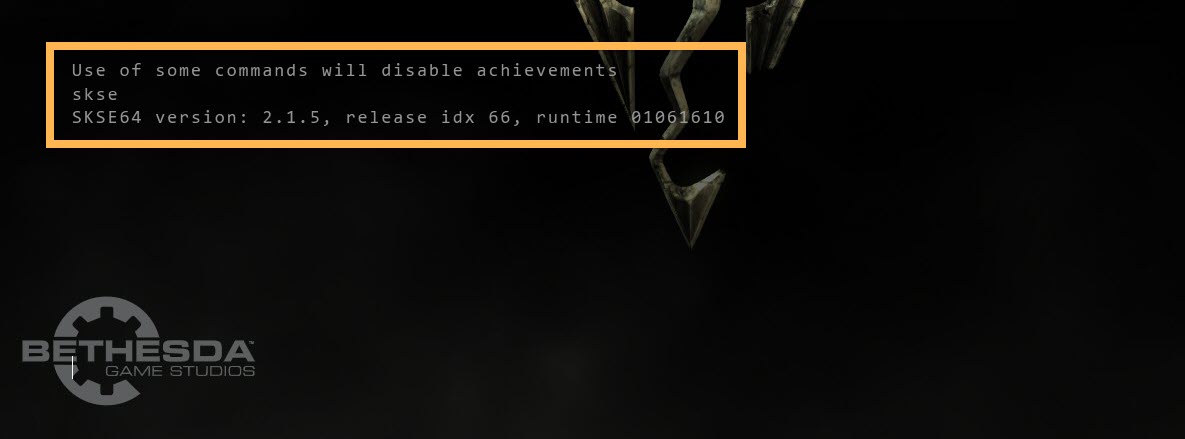
Once you are in the main menu, open the console, a dev tool that will become quite handy, particularly for troubleshooting. You can bring it up by pressing the tilde key (location marked in blue below, in case you have trouble finding it):

- In the console, type skse and hit Enter (capitalisation is irrelevant).
- It should return the version of SKSE you just installed.
- If everything works, close the console (press the tilde key again).
- Quit the game.